Before posting the picture, let me declare that this is a memory post. The memory post is that if you want to see the details of the modification, I may not be able to provide it, because it has been closed. Post the latest results first.
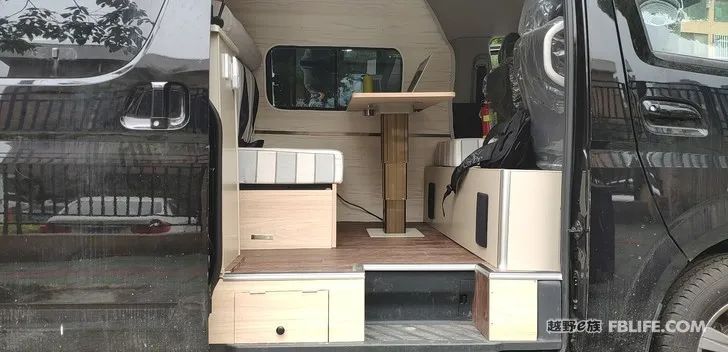
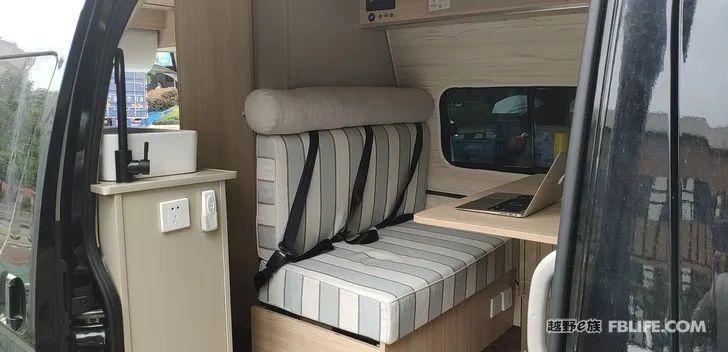
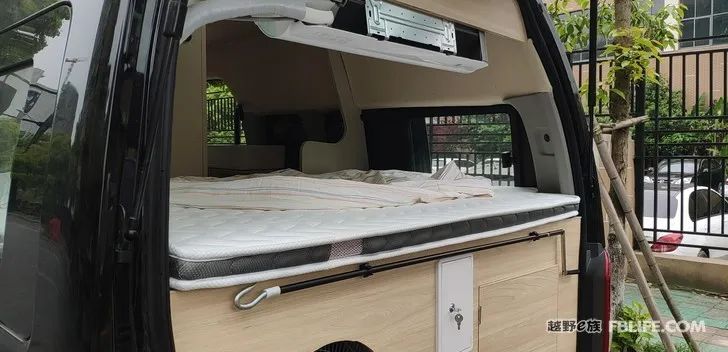
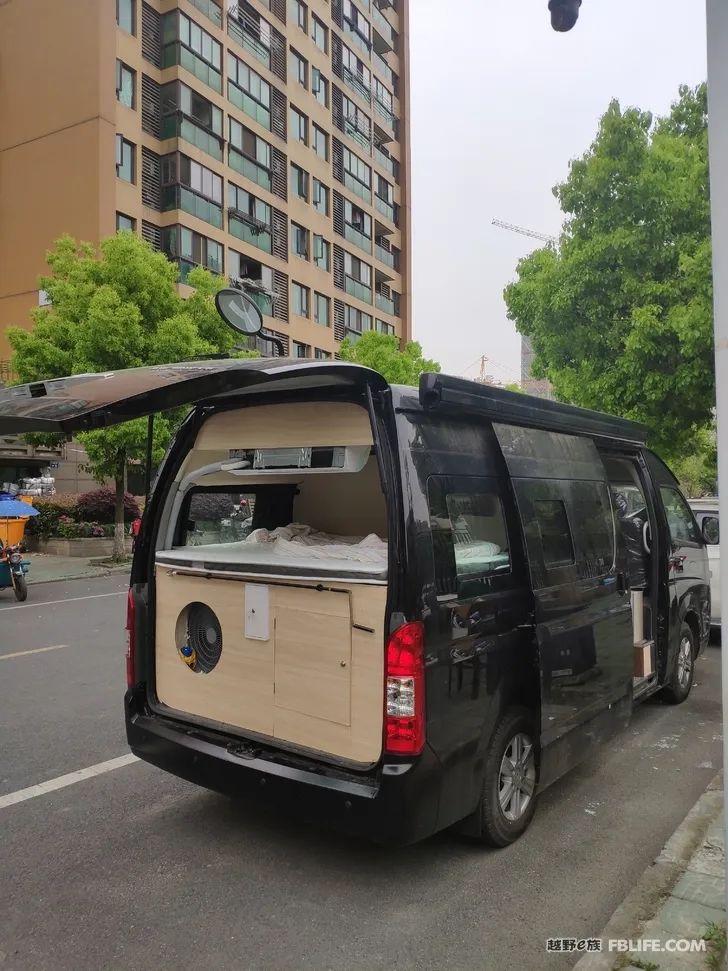
almost finished tail
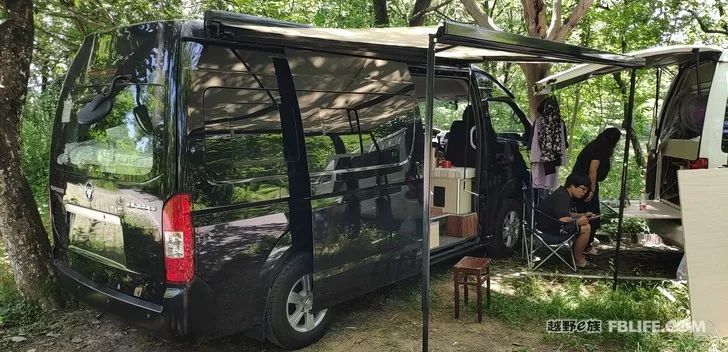
This is the first black and white match with the forum bean sprouts.
The car has been modified, and now I am sitting in the car, and I often admire myself for being able to complete it.
Before changing the car, I was a typical three-no-person, no tools, no site, and no experience. I just read a lot of posts and watched tons of youtube modification videos, and then I paid the deposit without telling my wife. Wait for the car to come.
Before I bought the car, I read Dou Sprout’s post, and went directly to the Dou Sprout company to see his car, so I knew the advantages and disadvantages of the car itself. So there is no nonsense at all when booking a car. The contract is directly transmitted online, and the payment is settled. The rest of the details will not be listed. Anyway, the car is here.
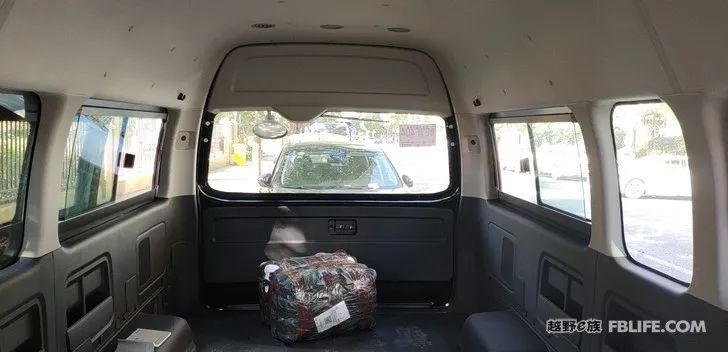
There is only one picture of the new car, and the back is the insulation material I bought. The modification started. My construction site is a dead end road with few cars. It is on the edge of the community and I drive directly.
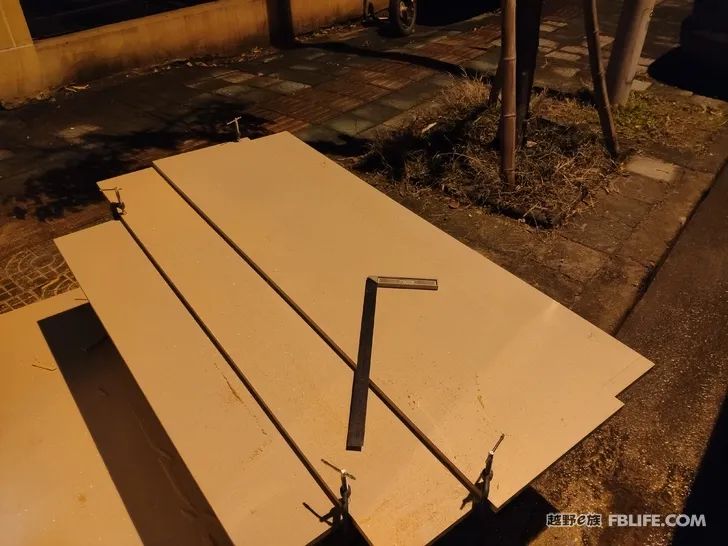
There is no woodworking table, so I directly put a wooden board on the iron frame of the chair I ordered as a woodworking table. Without a ruler, I took a board as a ruler.
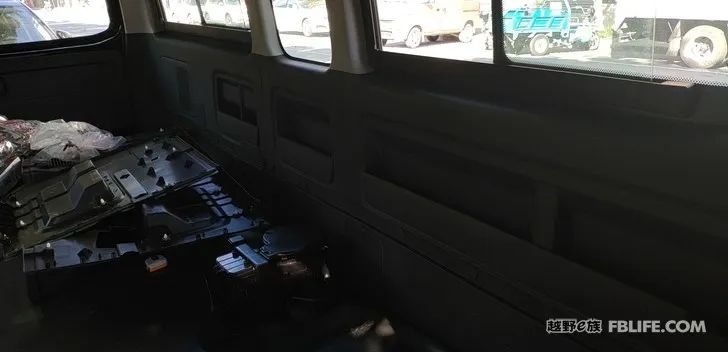
Start dismantling the interior. Because in order to get aluminum alloy tires and dual airbags, I had to buy a car with an interior, but when I saw the interior, I was terrified. Where would I throw it after I dismantled it?
Someone gave me an idea, call the repair shop, ask them to dismantle it, and give it to them. I stupidly called and asked, but they didn’t want it. I can only bite the bullet and dismantle it first.
These guys are quite difficult to disassemble. If I buy it next time, I still don’t want to bring the interior. After all, everything has to be thrown away, especially now that garbage cannot be put away casually.
Later, I dismantled it for a few days, taking advantage of the dark and windy night, and moved the garbage to the construction waste dump in the community.
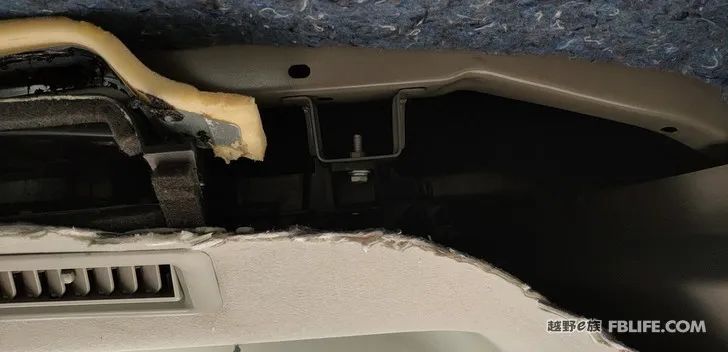
The difficulty of dismantling is so great that it cannot be described with pictures. I can only express the difficulty of my dismantling with a picture. I found a dog to take it down.
Since I didn’t switch to electric tools at the beginning, I always fantasized about cutting my hands, so the angle grinder I bought has been lying quietly. I can only use various tools I can find, such as my wife’s fish-killing scissors. I used it to cut it, and I also used my daughter’s utility knife to cut it. As a result, they all hung up immediately and were scolded.
Later, I finally found an extremely sharp industrial scissors, and then cut out the incision as shown in the picture below.
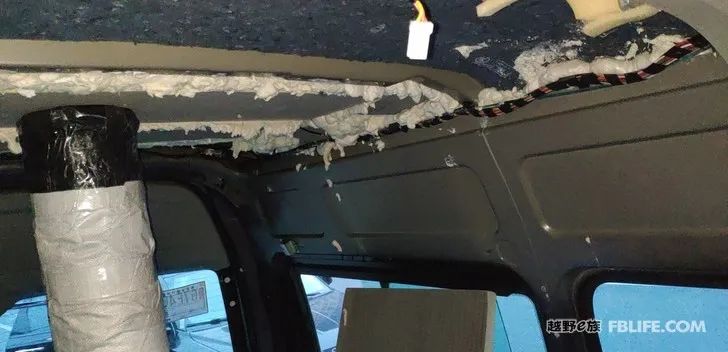
After the interior is basically disassembled, I started to do heat insulation. Since there are no poles (can the poor even afford it? No, no, no, I am actually afraid that I will end up buying it as garbage and have no place to put it, so I can use it. Replace it with other things first. This is a roll of insulation material that I used to hold up when I was doing insulation.
Use polyurethane insulation boards on the top, and then fill it with foam glue. I am a Ningbo Cheyou Zhuzhu. It is too difficult to use foam glue, so I use this method instead. Of course, there are various difficulties in the construction process. Sometimes it looks easy, but it is really difficult to do, especially for the first time, when there is no suitable tool. When I was doing heat insulation, I didn’t have a board to support it, so the foam glue leaked down in various ways.
My insulation is basically urethane boards with foam, but in hindsight, the insulation on the Model B is useless, the reason is because the inner and outer iron sheets of the Model B are connected, you can never separate them, in the sun When it was drying in the sun, my black car began to radiate heat inside the car after collecting the energy of the universe. In the end, every interior panel would be hot, and then continuously emit radiant heat, turning the inside of the car into a radiant heat. into the oven.
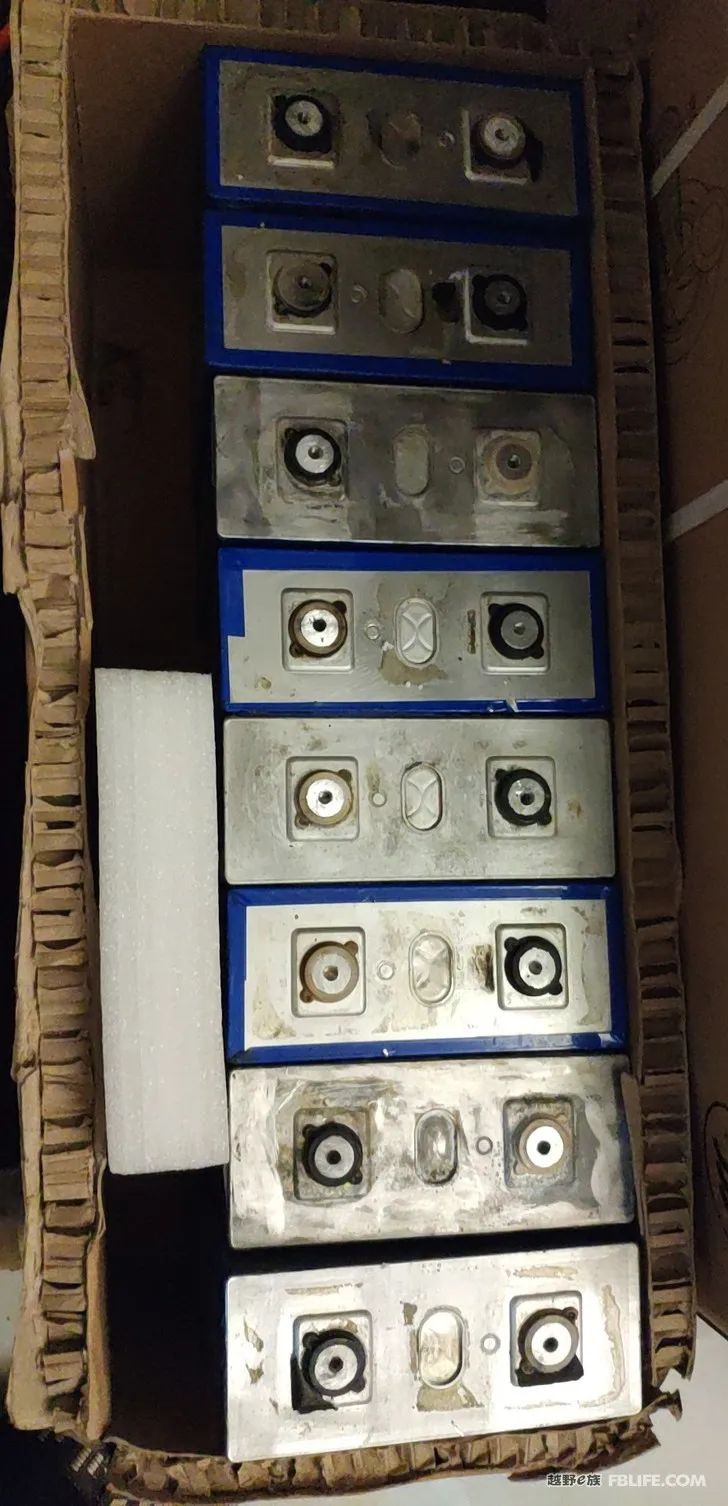
After the heat insulation last night, due to roadside construction, there is no way to continue without electricity, so I can’t wait to put the battery together first. The picture shows 8 pieces of lithium batteries I bought. This is a disassembled battery. It cost about 3600. I can’t remember the specific number. The total is 24V, 280Ah. If it is converted into 12V, it is 560Ah. From the current point of view, it is enough.
After I got the battery, I was very careful about everything because I had never touched it before, and I was always thinking about the legendary baozha.
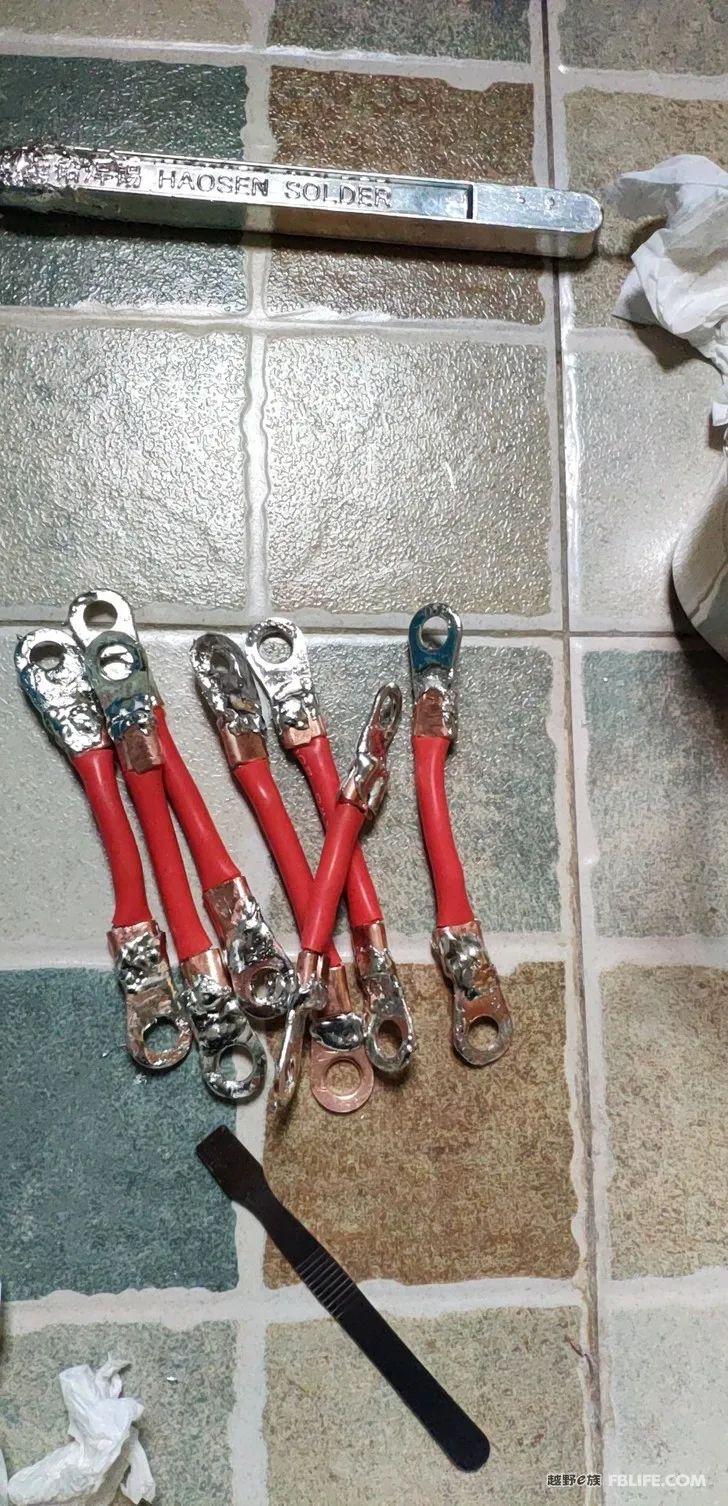
I use the American standard 6AWG high temperature resistant silicone wire to connect the battery, and then connect it with copper lugs.
Since it was the first time I had no experience, I was afraid that the copper nose knocked out by the hammer would not be strong, so I bought a soldering stove and prepared to fill them with tin, but it turned out to be like this bird. It’s really easier said than done, extremely ugly and uneven, I ended up smoothing them out with a file.
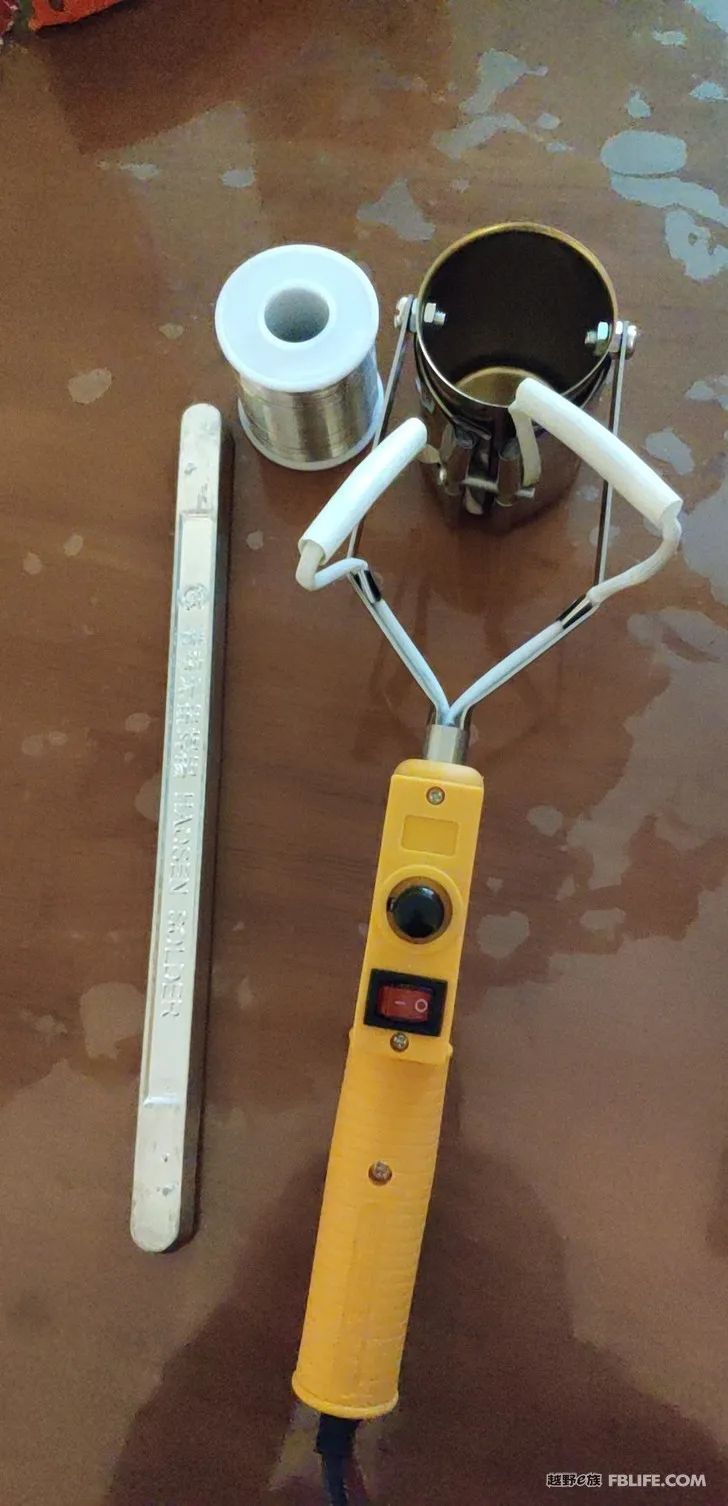
This is the solder pot I bought and a solder bar like a silver bar. Finally, I found that these are not necessary. It is the easiest and cheapest to connect directly with copper bars. I spent a lot of money on the battery connection.
I bought an inverter and a battery protection board (I used an ant control board, but others said that this thing is not suitable for a control board for an RV battery). Just use your mobile phone to check the battery capacity at any time, no additional coulomb counter is needed.
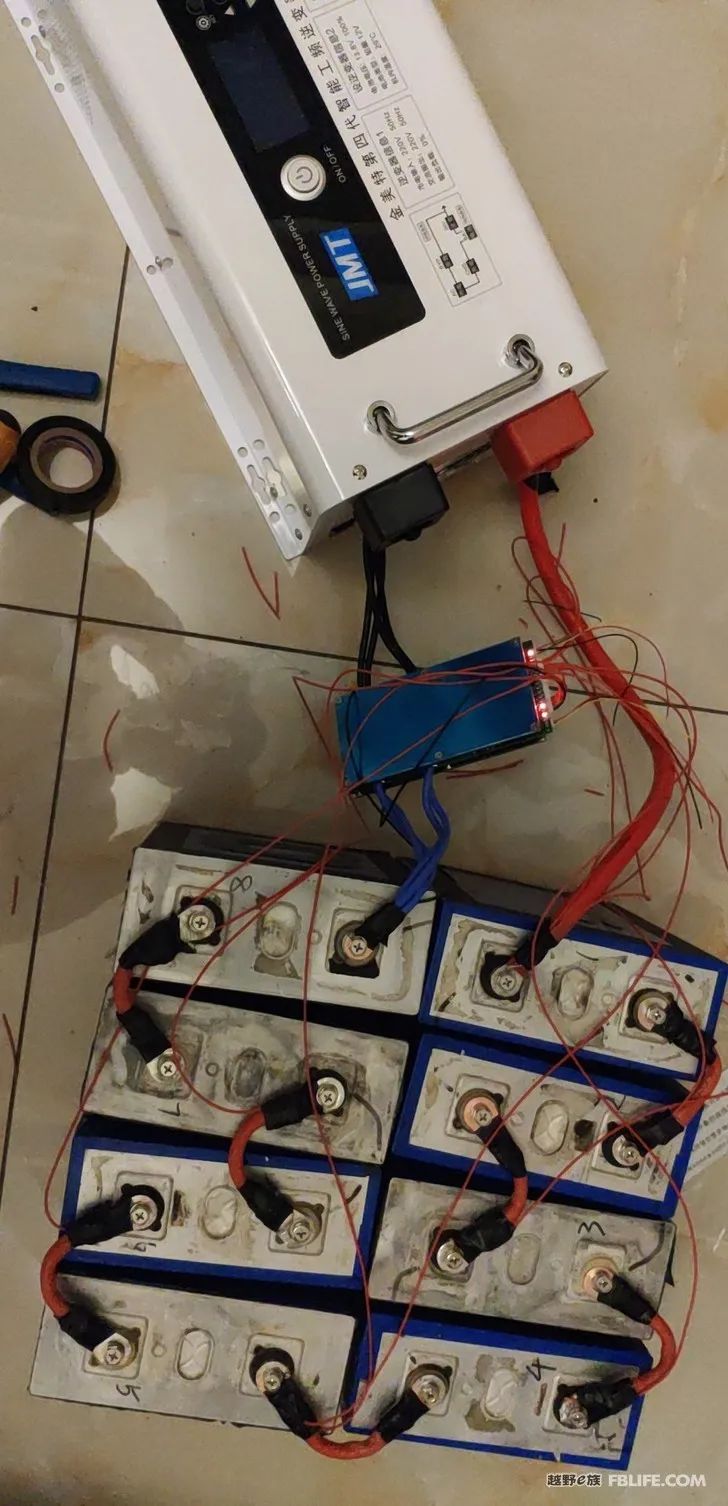
After all the batteries are connected, it looks like running naked. It should be noted here that the screws should use the kind of screws with spring washers to prevent loosening due to vibration and poor contact. I also use flexible wires to prevent loosening caused by vibration, and connecting with flexible wires will not have this problem.
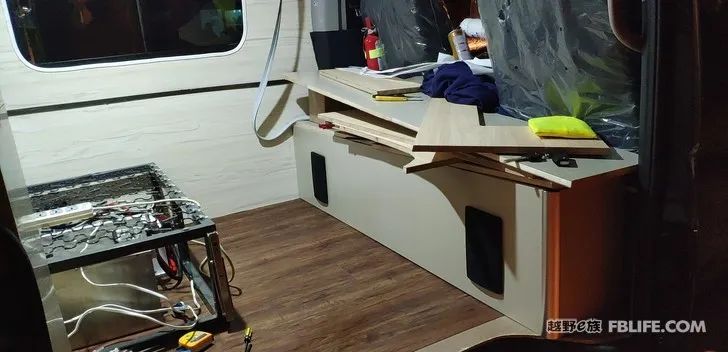
Of course, I didn’t let him run naked, so I ordered a stainless steel box. I graduated from a mechanical major, so I brought the CAD and drew a dwg picture. Taobao found a factory to process the stainless steel box. But I really can’t find the appearance of a simple battery. You can only look at my stainless steel lithium battery box from under the chair in my halfway construction picture. It’s in the bottom left corner, don’t tell me I can’t find it.
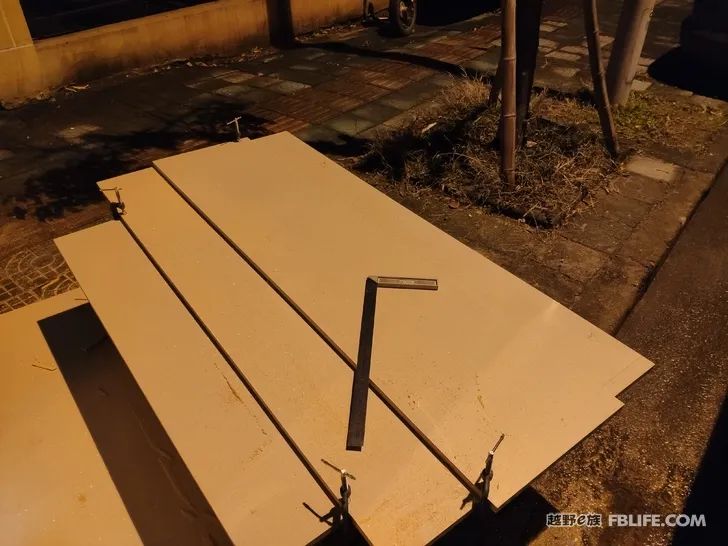
After the battery problem was solved, I was finally at my roadside construction site, taking advantage of the night, when the sound of quiet leaves could be heard, on a rainy day, I used my brand new electric circular saw to press the button with fear, and it made a harsh sound. After the sound, cut the board. Finished my virgin cut for woodworking.
Since I was basically alone at night and on rest days, there were not many beautiful pictures. This picture was taken to commemorate my virgin cut.
A keyboardist is naturally in awe of electric tools. Every time he starts the machine, he has to check all kinds of conditions to avoid accidents. Due to his caution, he is lucky not to be injured by electric tools after the car is modified.
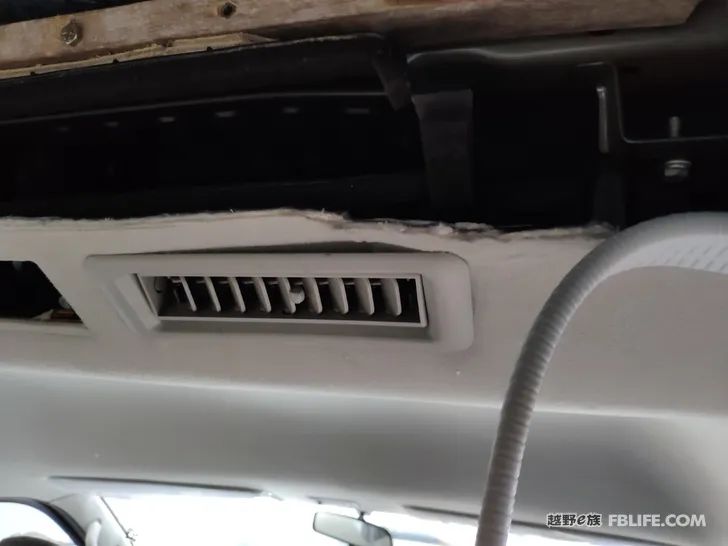
In order to repair the various ugly traces left by the previous demolition project, after thinking day and night and countless times in a daze, I finally came up with some good solutions. Using the magical U-shaped edge strip and adding a board may solve the problem, but I don’t know how to hang this board, and finally found a small wooden square in the garbage dump, which is the inconspicuous one on the top of my picture. A very old small wooden square, although it is very old, but the thickness and hardness are very suitable, so I picked it up, punched holes and prepared to put it on the board.
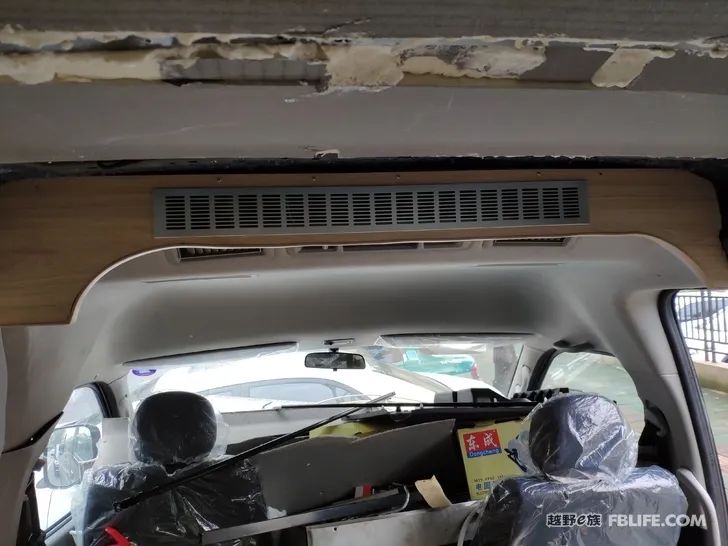
Done, it looks roughly the same after finishing it. Since I used a jigsaw for the first time, although I used my breastfeeding strength to stabilize him, the result was still crooked.
But at least I covered up the most ugly part, and I was still very excited at the time.
Before I continue posting, I have to express my gratitude. Since I am a novice, of course the theoretical knowledge is very rich, and the mind is not simple. The modification process has been supported by many netizens. Except for Dou Sprouts, I have never met anyone else, but every time I encounter difficulties, I go to the group Ask, the great gods always reply in time.
First of all, I would like to thank Bean Sprouts, because I copied his layout and improved the deficiencies.
The second thing I want to say is that the mountain man Lao Li in the forum is the light of my modified car. It is said that it is Lao Li, but in fact it can only be regarded as Xiao Li, because I am older than him and I belong to the same family, but I am definitely warm-hearted. Anyway, the decoration is good. When in doubt, I ask him.
The circuit part has received strong support from Brother Shi in Qunli. The purchase of batteries, wiring, and determination of battery voltage are all completed under his guidance.
There is also Anchor, a Ningbo car friend who has never met. In this forum, he posted a Datong car modification post. He is a good carpenter, has tools, venues, and experience. Occasionally, if you encounter details, you can send him a WeChat message. Ask, always have to wait for a prompt reply.
There is also Xiangyang Weige, I don’t know if he is in this jar, anyway, we modified the car together, the same model, we encourage and learn from each other.
There are many, many people, such as passers-by A, B, C, D. Because the roadside is changing cars, many people will stop to watch, and some people will give suggestions. There was even a passer-by who did it for me directly, and I decided to call him a passer-by. If it weren’t for this passer-by, I wouldn’t have been able to install the awning. The details will be shown later.
After writing the thank you letter, I will continue my modification story. After sawing off a board, my confidence will increase greatly. I started to plan the various parts of my RV, and started placing orders from Taobao. However, what I read in the book is always shallow. When some things are sent to me, they are always unexpectedly large or unexpectedly small. The first thing that came as a surprise was my awning, which was sent to me. I was dumbfounded when I saw it. It’s too big and heavy, right?
What’s even more amazing is that I’m so stubborn that I actually wanted to do it by myself, but I fell down heavily. Oh, it was the awning that fell down, not a person, and the awning hasn’t fallen yet. He died heroically on the battlefield.
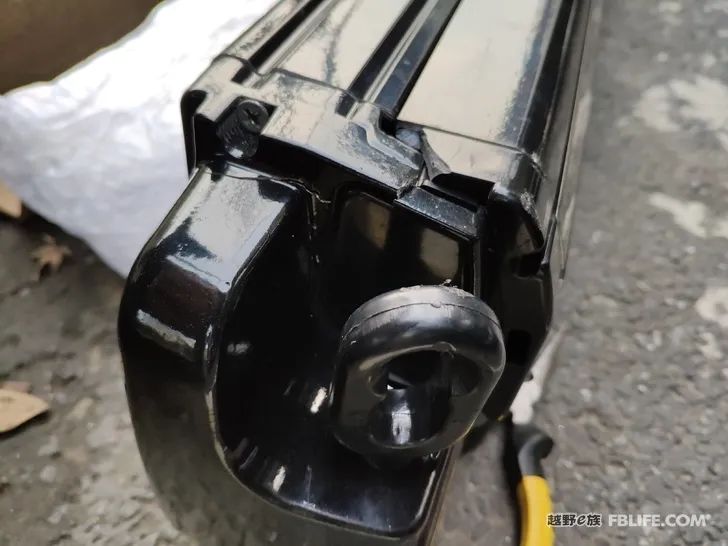
The cracked awning can no longer be used. I hurried to Taobao to find the customer service. The customer service said that they have accessories, which can be repaired by hundreds of oceans. over him. Then I learned how to be good, and I didn’t dare to do it alone. It was urgently discovered that the outer wall of the G9 was too curved, and the sunshade could not be installed directly. Lao Li sent his installation module, and after asking, he found that the ironworker of his refitting factory knocked it out by himself. Where do I have this ability, so I started to think of a way, and finally drew a perfect CAD drawing by profiling the curved surface of the outer wall.
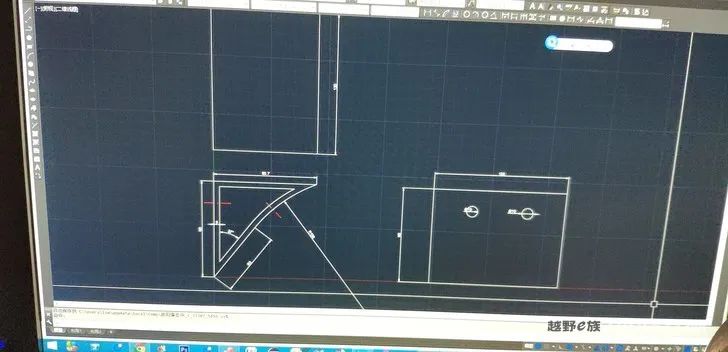
The perfect three-dimensional view has brought out the skills I have learned in 19 years. I don’t know that the processing factory can’t handle the curved surface, dear. When I say kiss, I actually want to scold someone. I do all kinds of profiling, surface calculation, curve fitting, and finally simplify it into a section of arc, and then manually process an aluminum plate to stick it on. In the end, I made the curve into a straight line by myself, so-so is still feasible. So I placed an order for processing, and asked him to process the steel gasket inside by the way.
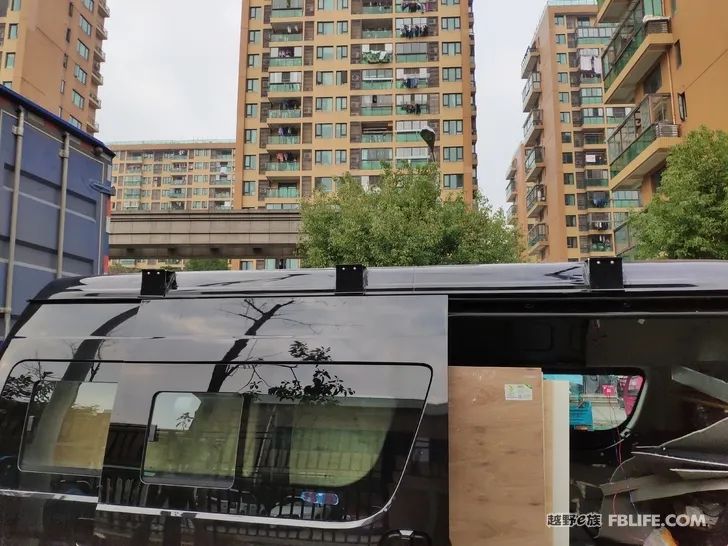
This one is installed, and the details are a little bit worse than I expected, because there is no curve, but after all, it is done. The 3 pieces cost about 400 oceans. I am too lazy to check the order. I have an Excel material purchase. The table, but on another computer, when I go back to Hangzhou, I can take a screenshot and send it to everyone, with a price and a link address.
After posting this picture, I want to talk about my construction site again. Because there is no site, the car is a warehouse, and materials are piled up everywhere. There is no way for normal construction. You can take a look at the situation in my car. It’s a mess, and you have to flash back and forth when you walk in. Finally I couldn’t bear it any longer, so I went to the property director of the community with the cheek, and begged to borrow a piece of precious land for me to put the materials. Move the boards that are temporarily unused to the community.
When I was looking for a picture, I suddenly found a picture of my battery, so let me show my battery.
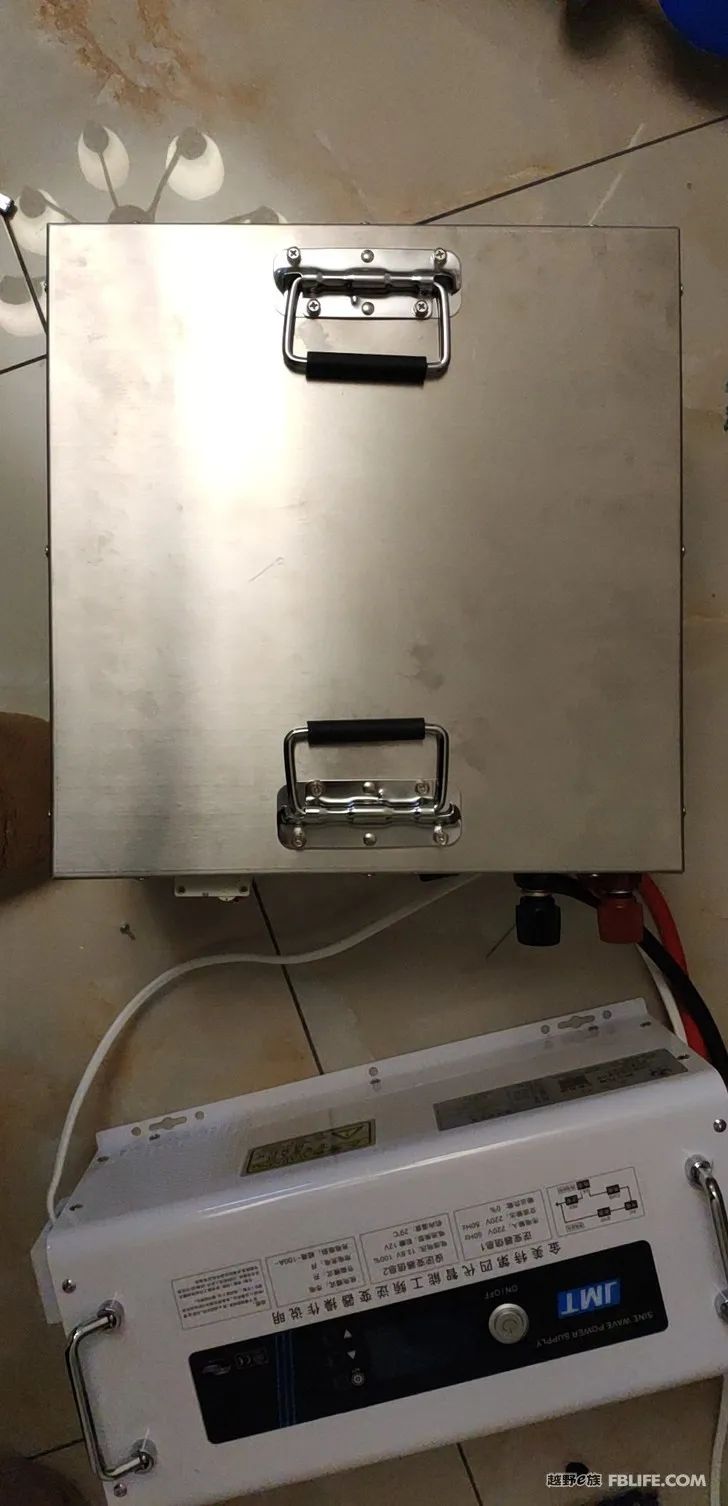
Is it handsome or not? The expansion space is designed inside, and the processing fee is not too expensive. It seems to be about 200 oceans. I will move it into the car like this, and I will have electricity at once. I will use the 7 kWh electricity after the renovation is completed. Finish.
Continuing with the main thread, with the help of a passer-by, it should be said that he was constructing, and I installed the awning with my help. What does it look like after it is installed? You can see it by turning over the first picture. I will not repeat the texture. To save server resources, resolutely do not put a large number of pictures. In fact, I have no pictures at all, because it is basically a single-person operation, and I don’t have the consciousness to take pictures. Everyone, fill in your brains with the picture of the awning installed, it is quite handsome.
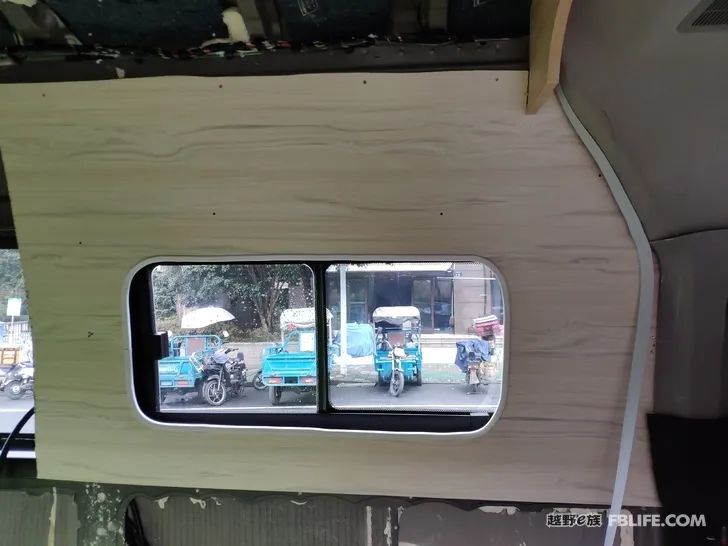
My first interior panel is on the wall. Is it disgusting to vomit? It took me a lot of effort to get it up. It’s so shallow on paper. I didn’t expect this interior panel It is so heavy that it is difficult for one person to handle it. Finally, with my unremitting efforts, I got it done.
I also dug out a window with a jigsaw in the middle, and bought a hundred yuan edge banding strip to make up for the defects of my craftsmanship.
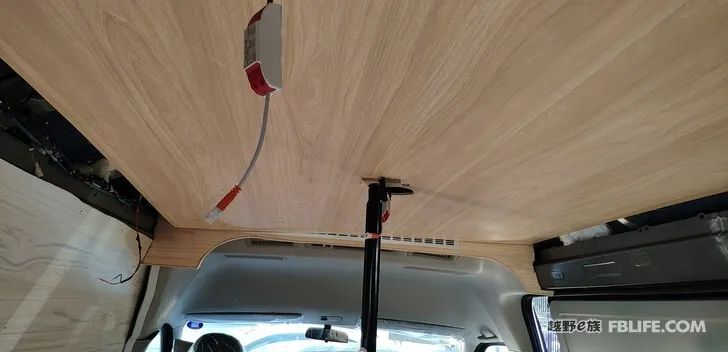
Now that the top board is on, a complete board goes directly up, but it is not long enough, and I only bought one board, and the board was bought online, which really hurts me. There is no top pole, so I directly use the support feet of the awning to top it. Without help from anyone, I got the top board up by myself.
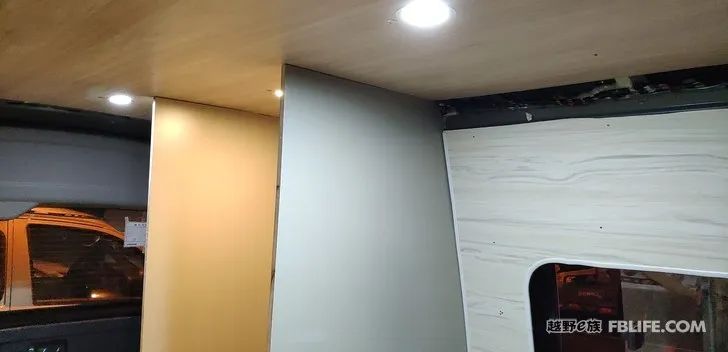
At the beginning, the board in the bathroom is also a curved surface. I still realized it through my magical profiling technology. I erected the two boards. How did you see the potential of qualified carpentry? The screeching sound of the circular saw is gone, and the jig saw is also beginning to be used proficiently.
Look at the lights, everyone. I was working at night. I was afraid of disturbing the residents. Later, I asked a few neighbors if they heard my harsh chainsaw. When they said no, I felt relieved, otherwise I would be complained to the urban management. If you come to interfere, I can’t go on.
I am going to make a hanging cabinet. My basic thinking is to hide my ugliness, because the G9 is not high enough to make a wall cabinet that is too high. I found that the 17mm plate was too thick and heavy to make a wall cabinet, but I didn’t buy a 12mm plate at the beginning, so I had no choice but to continue. I used an aluminum alloy profile with a 12mm opening for the corner, and used a trimmer to cut the 17mm plate. The board is thinned to 12mm for insertion, perfect. This corner aluminum profile is quite good, small and beautiful, in line with the temperament of my wall cabinet, specifically referring to Lao Li’s wall cabinet. G9 is just right for a wall cabinet with such a height.
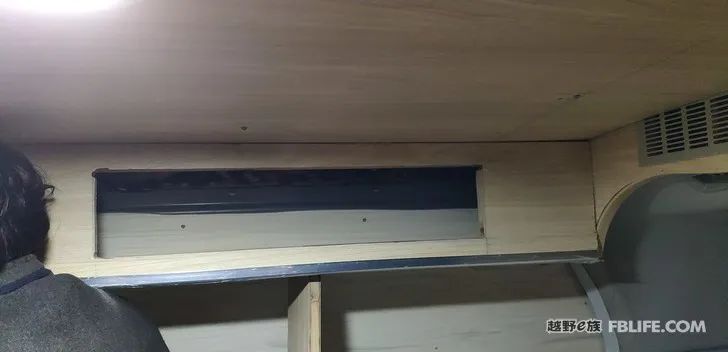
This hanging cabinet is actually disassembled and reassembled. Fortunately, I used nuts in the wood, otherwise the wood would be ruined. Speaking of craftsmanship, I have done it well in terms of firmness. I went to the Northwest Ring Road and Gannan, and walked through the 200-kilometer super road block under maintenance, but it didn’t fall off. The structural mechanics taught by the teacher is not in vain. When I did it, if it was considered that the parts to be disassembled were fixed on the car body with rivet nuts, and the wood was drilled into the wood with a threaded auger, so that it could be disassembled and repaired many times, unless it was not disassembled. The structure is directly fixed with self-tapping screws.
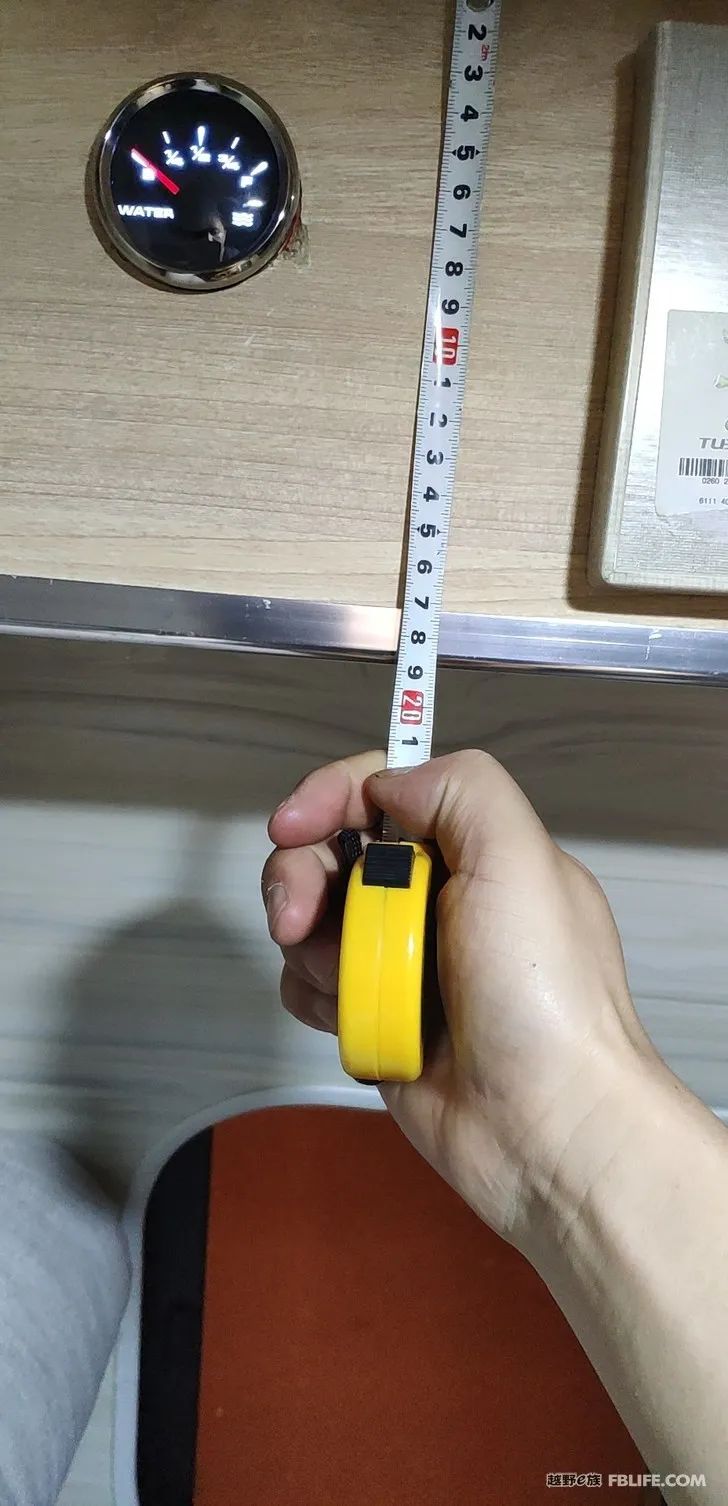
This is the photo I took when I asked for the size of the bean sprouts after it was installed. You can refer to it for making G9.
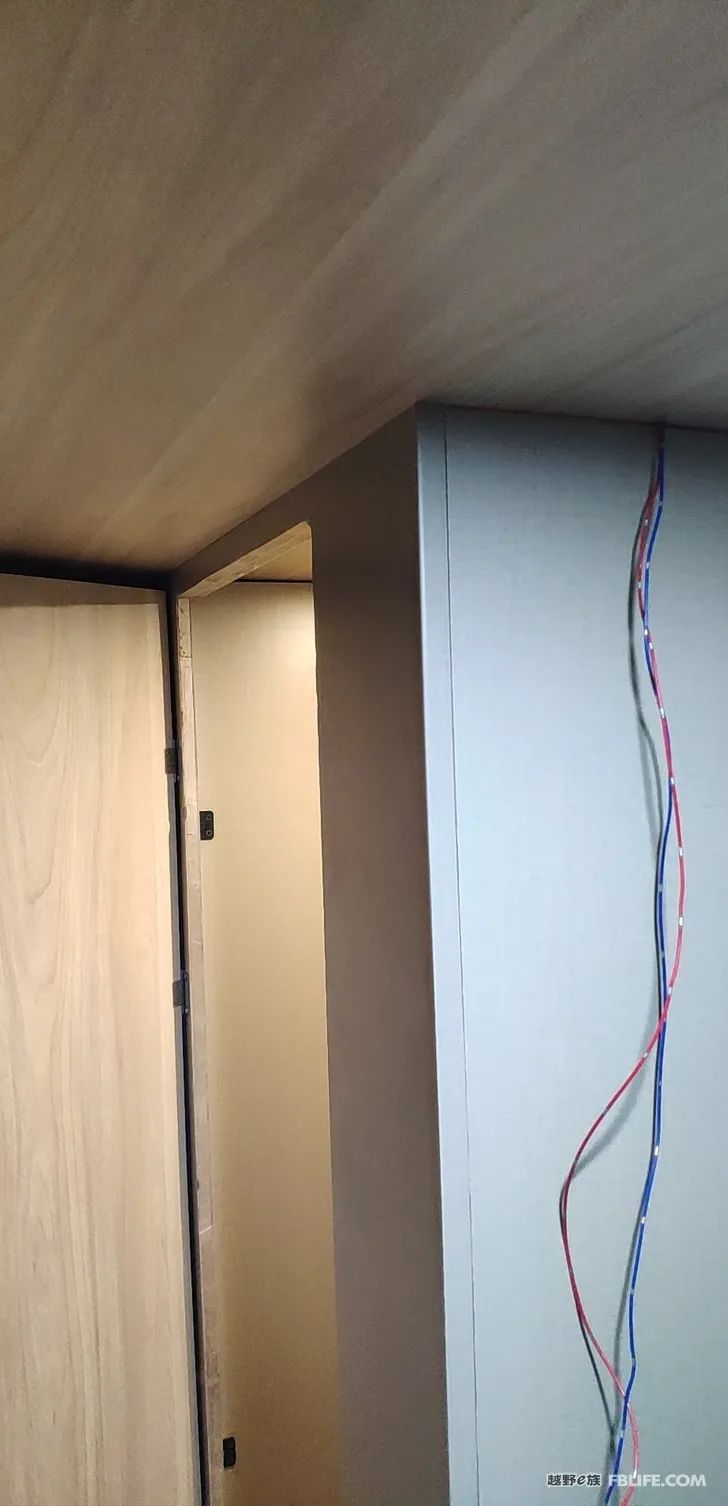
I used the way of covering the door of the bathroom with a layer of boards, so that there is no need to cut the boards precisely, but I saw that most manufacturers did the same. The only regret is that the boards are too thick, and the 17mm board is really thick. I really want to buy a 12mm board, but I can’t buy the color I want, so I can only use a 17mm board. The boards for home use are all 17mm, and there may be no market for 12mm.
In order to reduce the weight, I didn’t buy multi-layer boards, which was a bit of a mistake. In some places, multi-layer boards still have strong nail holding power, and the core of solid wood is not as good as multi-layer boards.
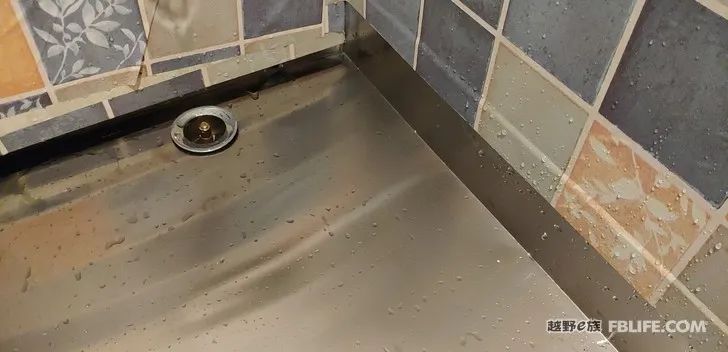
Inside the bathroom, waterproof stickers are used, and the stickers are directly attached to the stainless steel water tray, so that the water will not get to the plate, and the joints should be covered with a similar method to prevent water from entering. Originally, I wanted to cover it with that kind of transparent pvc film, but after looking at it, it was perfect.
One regret in the bathroom is the drain. I can’t use my floor drain model for the drain, because the floor drain will be a little higher no matter how high it is, and it will be difficult for the water to go out completely. You need to weld a pipe to make it completely flat, otherwise you will get water it’s painful.
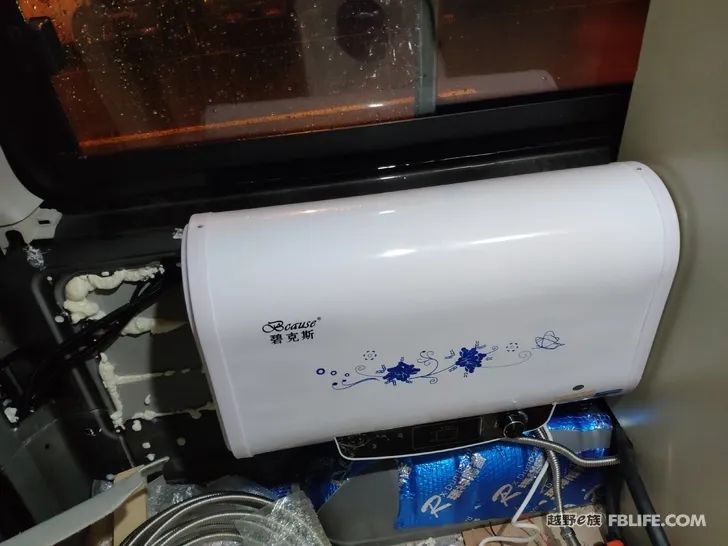
I started to install the water heater. The water heater I use is both electric and gas-heated. It seems that it is less than 500 oceans. G9 is a very simple car, because it comes with a rear heater, so you can directly remove the rear heater, and transfer the cooling water of the heater to the water heater.
Let me show my water heater system in detail. The water heater is connected with its own heating. It is a dual-purpose water heater for heating and cooling specially used in the north. It can be bought in auto supply stores, and it is not expensive), the system needs to do a 6-point pagoda-to-outer wire conversion. See the picture below for details, I took it specifically.
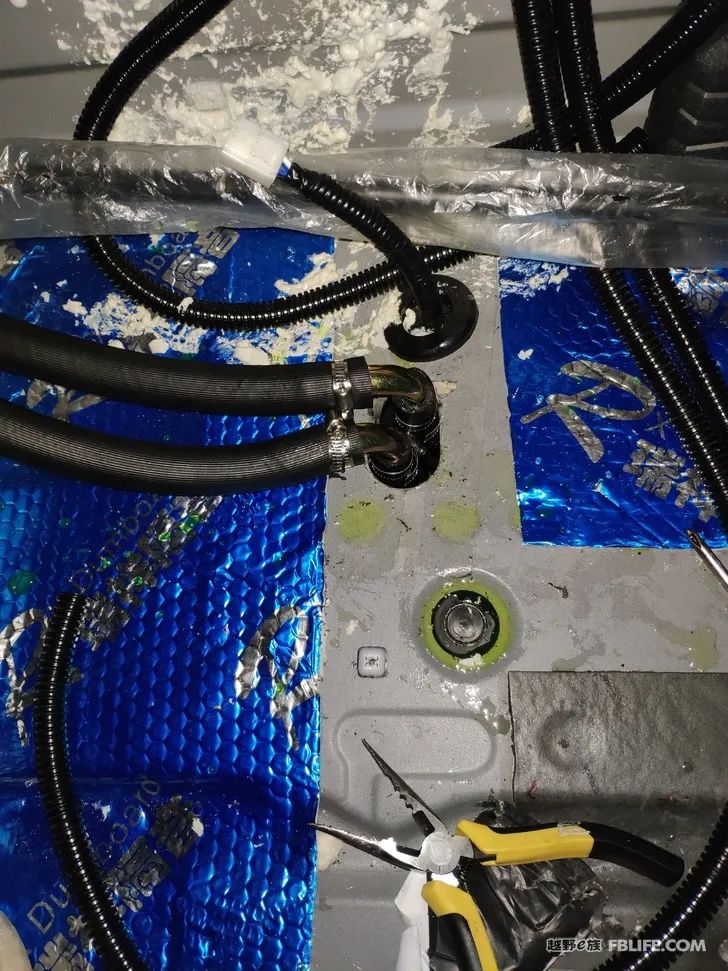
Just connect two warm air pipes directly from the original warm air pipe. I bought two 135-degree adapters and connected them to the water heater in the picture below.
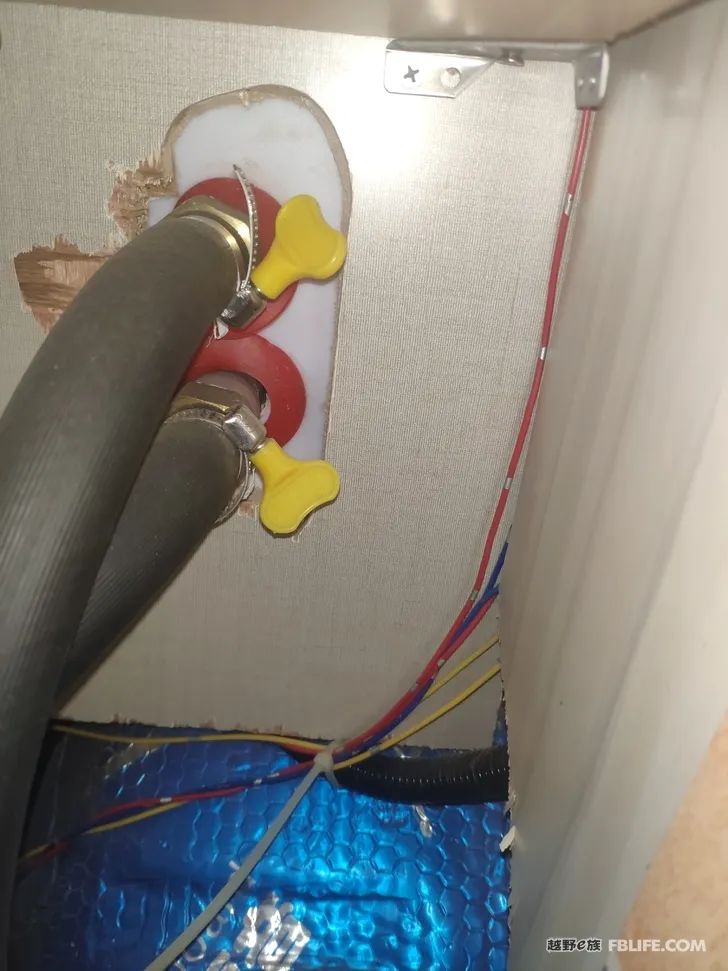
Continue to introduce my waterway. The waterway thought it needed to be durable, so I bought stainless steel pipes. As a result, this greatly increased the difficulty of my construction.
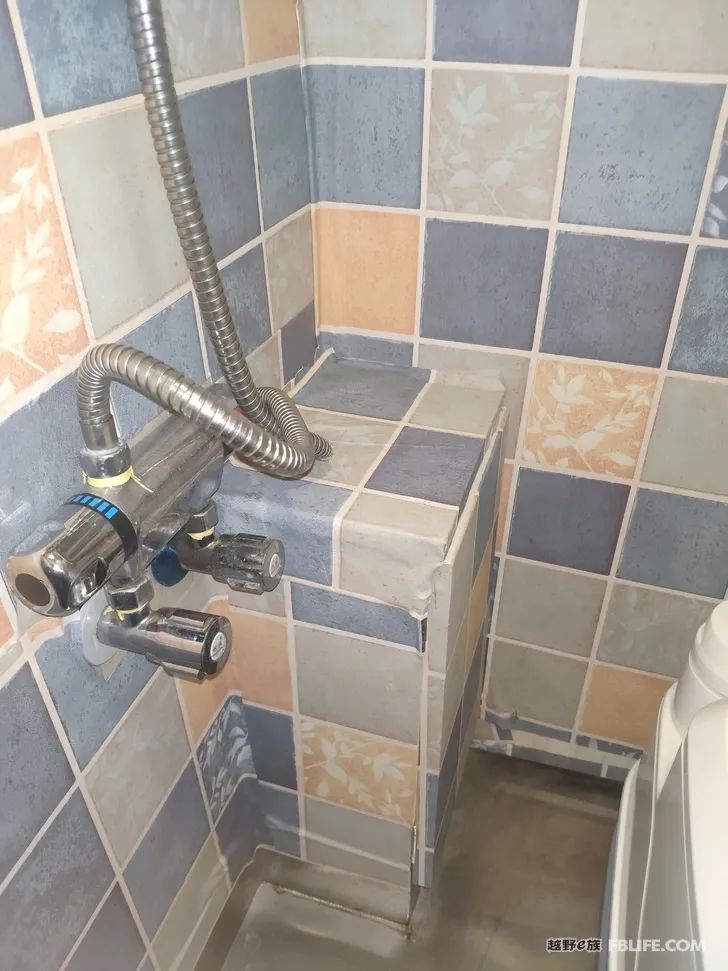
These things are sealed in this frame, and they are usually invisible. There is a small door that can be opened for maintenance. In addition, I equipped a thermostatic mixing faucet, which is very easy to use, not expensive, but very easy to use. The advantage of this hot water solution is that it is very suitable for G9, it does not require advanced technology and can be easily done, and it is very easy to use. There are also disadvantages, that is, he uses cold water to press out hot water to yo, that is, he always has to carry 40L of water and cannot use it. This is the same as the electric water heater at home.
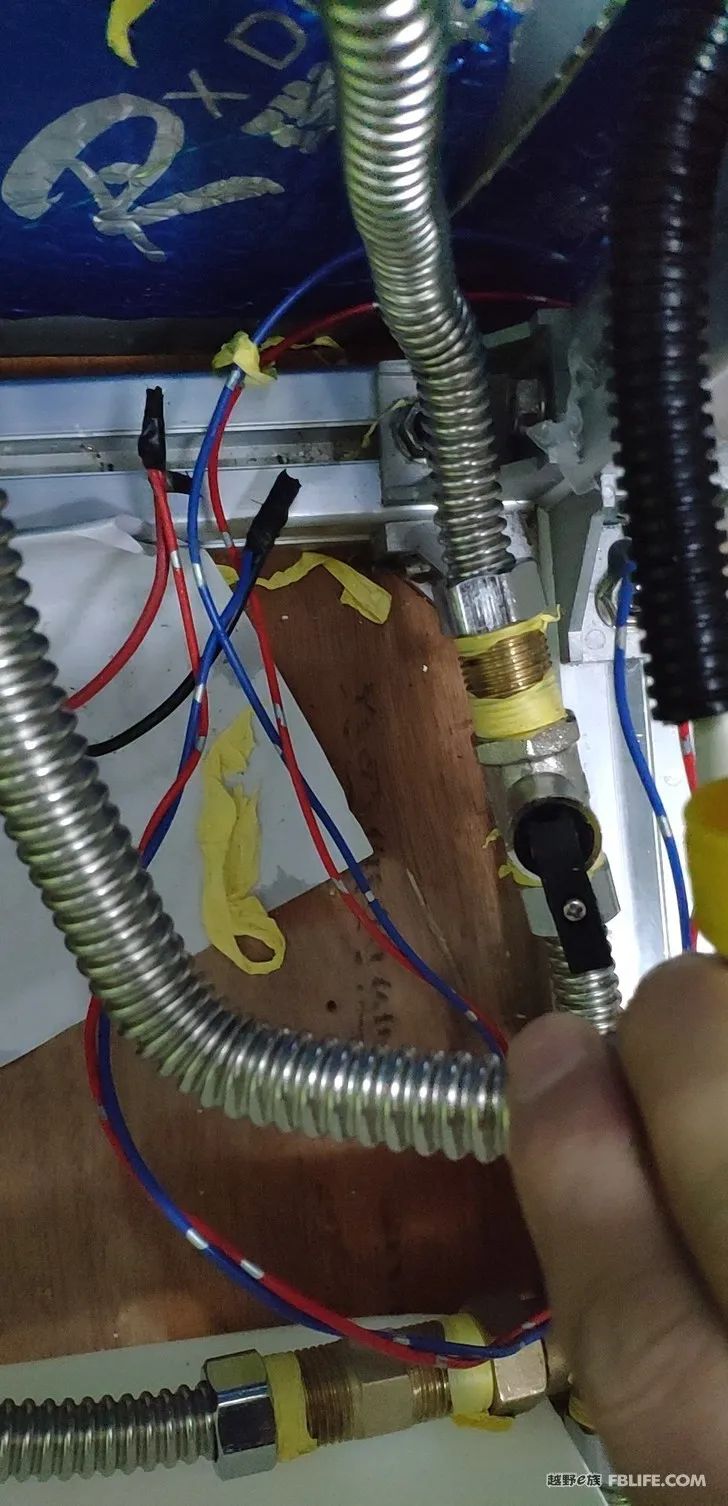
The pipes of the waterway are like this. They are crooked and very uncomfortable. I have obsessive-compulsive disorder and I really want to scrap these pipes, and then directly buy software to replace them. . This pipe is really strong, and you don’t have to worry about the problem of bursting the pipe after it is connected. It’s just that the construction difficulty has increased, and it is very disobedient. Later I asked others, most of them use software pipe connection, Ningbo car friends like pvc pipe connection, that seems to be more troublesome than mine, and can only go at right angles.
I always use this kind of pipe for water pipes, and then copper adapters. I bought a lot of adapters and bought them many times one after another. The certain treasure platform is really good, allowing me to complete the purchase of all things without leaving home.
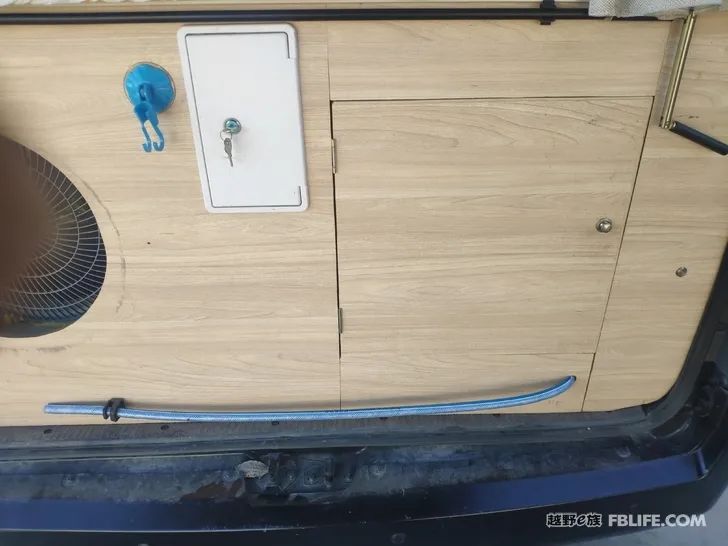
My water filling system is self-priming through a pump. Take out the pipe from here and connect it to the bucket. Other long pipes can directly receive water from the faucet or lift water to the bucket. Press the small electric button to automatically add water. You can also get a pipe extender directly, and add water directly from the river. I have a pp filter cotton inside the water, and the whole bottle will be dirty after going out for a trip, which means that the water quality outside is not good, and this must be installed.
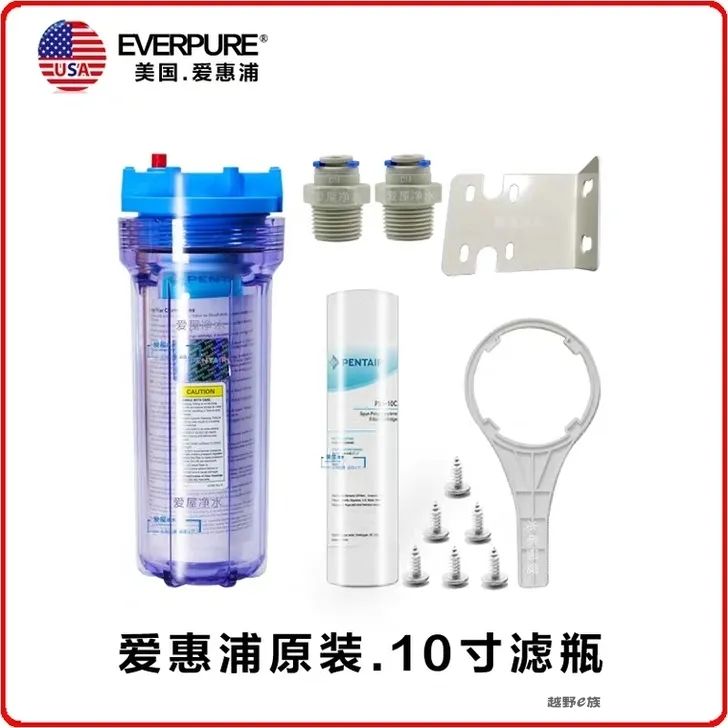
This is the primary filter, which enters the water tank after filtering, and the water is not for drinking but only for washing pots and pans.
I started to introduce my bed frame. Considering that the bed must be stronger, I originally planned to find someone to weld the frame. It turned out that the welded frame cannot be moved into the car, that is, it must be welded in the car. Where can I find this? Cannai came to find someone to weld the frame in my car, so I continued to do it online and directly bought aluminum profiles to do it. It’s just that the profiles are a bit thicker. I use 40 profiles, and the firmness is beyond my imagination.
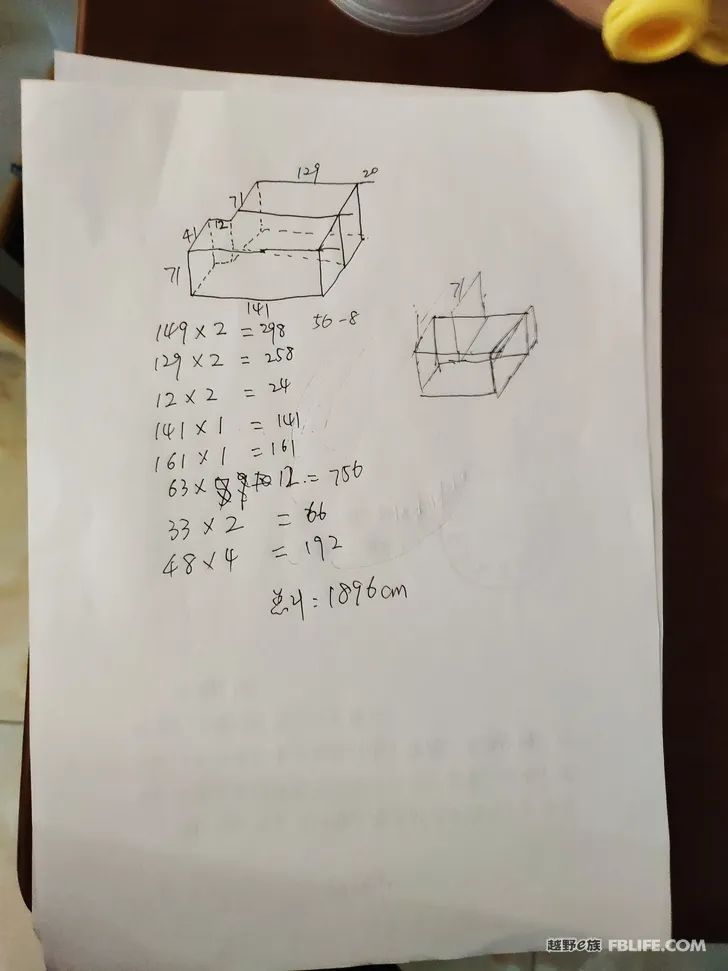
As long as the profile is a sketch, I just sketch one, and then calculate the number of pieces required for each length, and then find someone to quote.
When designing the frame, I considered that if a serious rear-end collision occurs at the rear, there must be absolutely no vertical pipe or plate poking from the back to the front to affect the safety of the people on the seat. Therefore, there are no objects longer than 70cm in the driving direction to prevent rear-end collisions. After being hit and compressed by 70cm, he passed through the bathroom and stabbed the person on the seat.
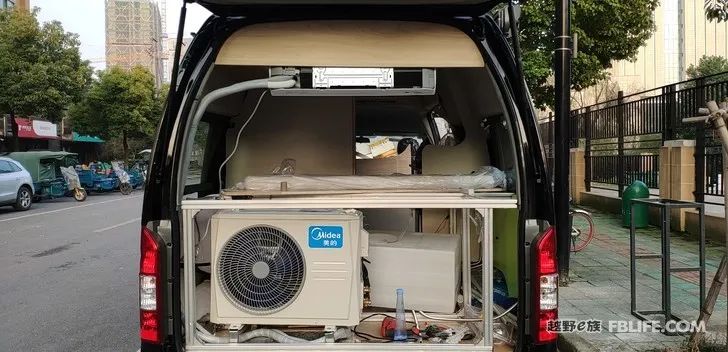
After buying the materials, assemble the shelf by yourself, and it will look like this after installation. In this picture, the air conditioner has already been installed, but in fact, the air conditioner was installed at the back after the shelf was completed.
In addition, when tightening the screws, in order to prevent the screws from loosening, I used all screw glue.
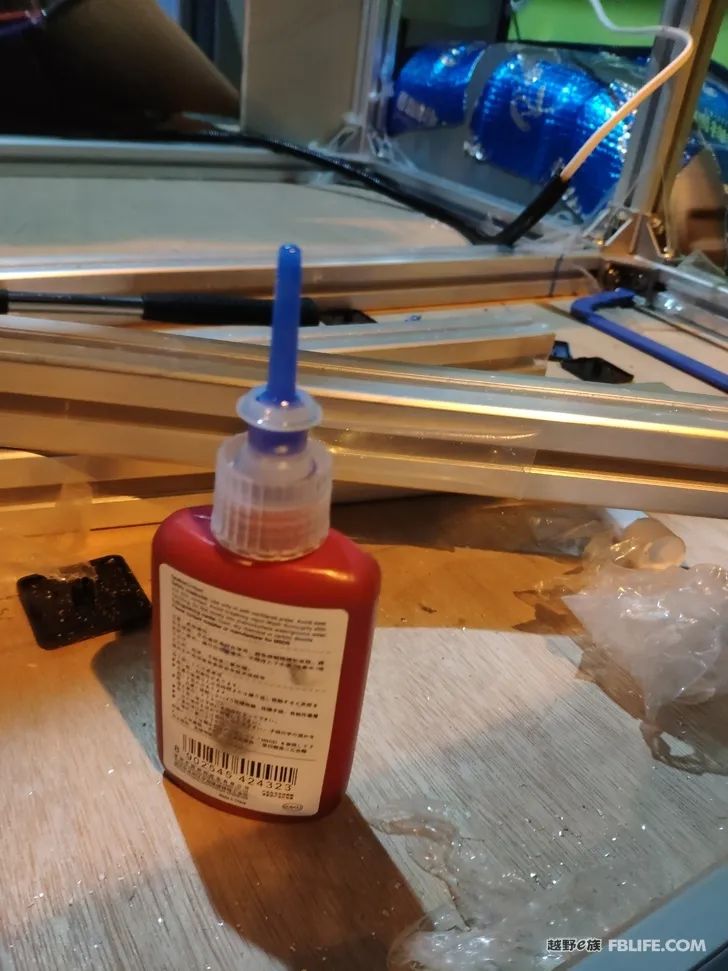
It is a screw glue like Zhang. Add some glue before screwing to prevent the screw from loosening. This kind of slow-drying anti-loosening screw glue can be unscrewed with great force. It is just to prevent loosening caused by vibration. It is also a treasure. Bought online, free postage 9 yuan, just used a little bit.
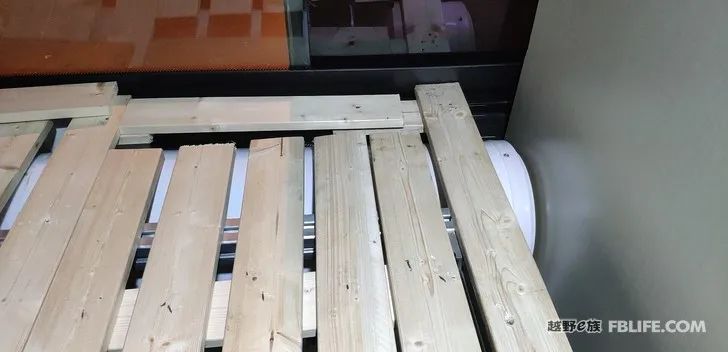
The bed frame is spread out with pine wood strips, and the pine wood strips are also in the horizontal direction, mainly to prevent the pine wood strips from piercing the front seat when the rear end is collided. But these are just my assumptions about safety, I don’t know the actual effect, and it should be reliable when I think about it. When making a car by yourself, you have to consider safety more or less.
The front half of the bed board is movable, which is convenient for putting things under the bed. The board is used to make a cabinet under the bed, which is used to store huge cups, clothes that are not often worn, and the like, because the bed board needs to be turned over.
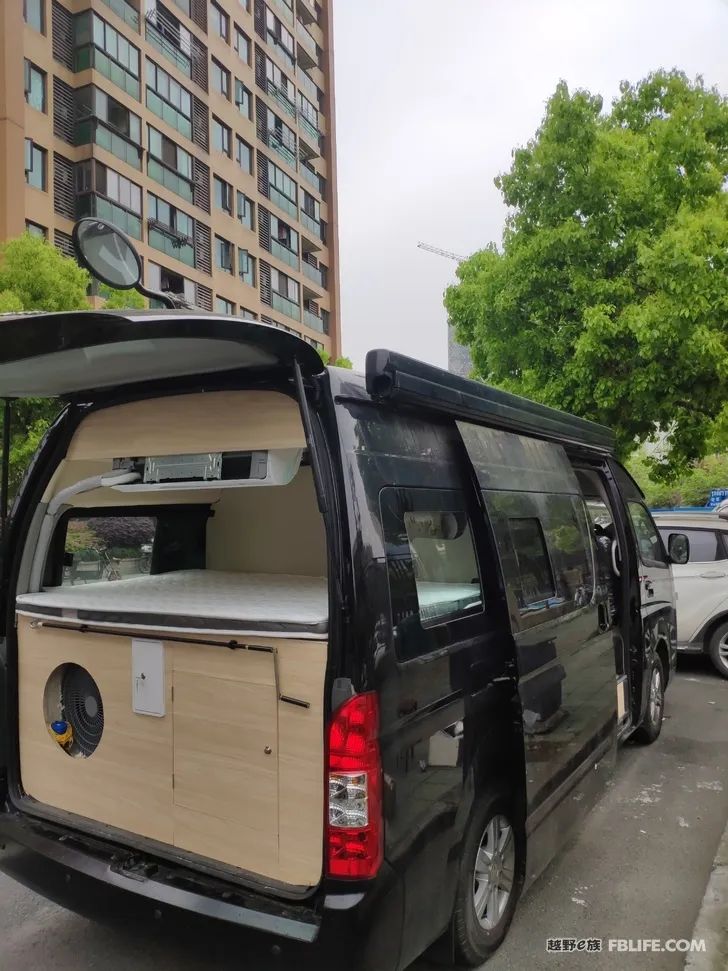
I customized a mattress, which is a palm and latex integrated pad, soft and hard, very comfortable. The board is attached around the bed frame. I used the Ningbo anchor007 method for the board, which is to use threaded nuts to plant in the board first, and then screw on the outside. There is no trace of the screw on the outside, and it can be easily disassembled many times.
When it came time to make the bed, I could already saw very precise boards with an electric circular saw, and I could directly make a door without much error.
I started to introduce my air conditioner installation. For this air conditioner, I didn’t know how much I sat in the car. Every time I told my wife that I would go to the car for a while, I was actually thinking about the installation of the air conditioner. Finally, inspired by Shanren Lao Li’s plan, it was finally done.
The air conditioner is generally used, and it will generate thermal protection when it is running at full power in hot summer. My solution is to open the back door when starting up, and after more than 10 minutes of full power cooling, close the door at the back. There is no heat exchange. question.
In addition, I also found that the use of the air conditioner in winter is heating, which does not consume as much power as I originally thought. After I set the temperature to 22 degrees, it only runs at full power at the beginning, and the power is only a few hundred watts later, so I There is no need for other heating equipment to heat at all, and the air conditioner is directly used for heating in Hangzhou, Zhejiang. Basically, I work in the car every day, and the air conditioner can be heated by solar energy throughout the winter, keeping the indoor temperature between 15-20 degrees.
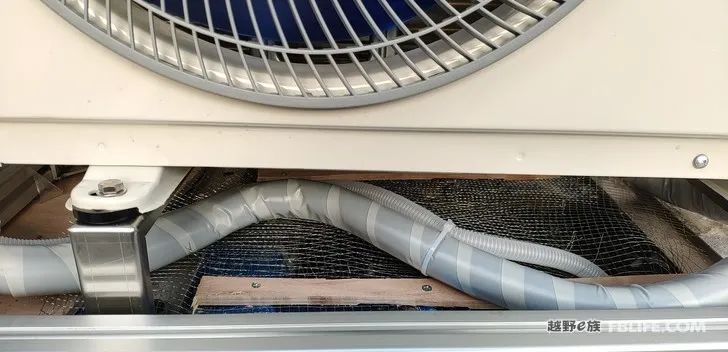
This is a hole dug at the bottom. I refer to the size of other manholes in the jar. By calculating the air intake area, I found that it must be raised up to allow the wind in the hole to penetrate the cooler, so I bought a shelf decisively. The height is 10cm, and a barbed wire mesh is placed under the hole to prevent insects from getting in.
This is a photo taken by the air conditioner when he connected the pipes for me. It is very strong, so the trembling road did not vibrate down.
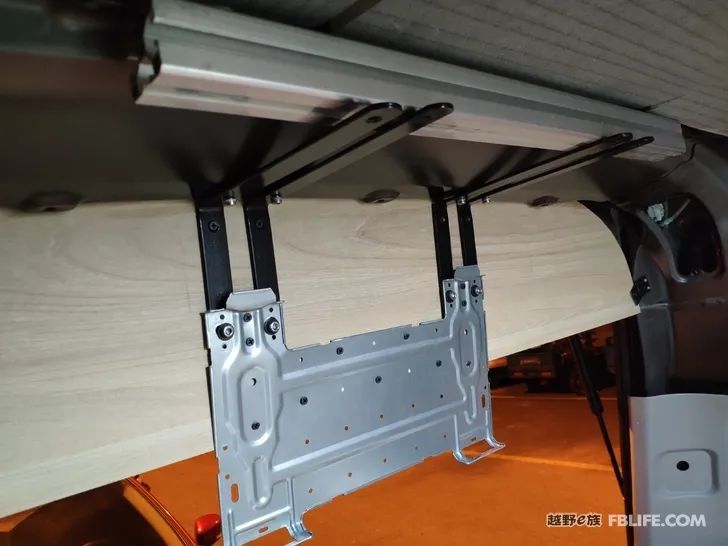
The installation mode of my air conditioner internal unit is the method that confused me with this air conditioner internal unit, and it took me a long time to figure it out.
Shanren Lao Li’s plan is that he has a master ironworker directly build an iron plate, a very strong iron plate. I don’t have a master ironworker, so I bought 4 L brackets, which are said to be 4mm thick, and then use rivet nuts to plant M8 nuts into the car body, and then screw the iron frame to the nuts, and the other end is because The car body is not flat, a 40mm aluminum profile is used to pad it, it is just right, God help me, it is just right.
Then screw the iron plate that comes with the internal unit to the screw, and then screw it to the plate to prevent him from moving back and forth. I think the reason why this model is feasible is that his iron plate is so thin, if there is a problem, it should be the iron plate that has the problem first.
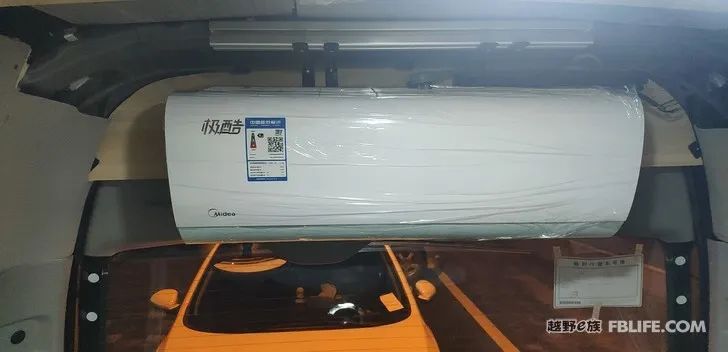
After the brackets are all done, just hang up the internal unit, and wait for the air conditioner installer to connect the pipes, and then the difficult air conditioner is completed. In order to allow the air conditioner to take in air smoothly and have space when disassembling, I specially left some gaps on it.
Have you seen the messy look at the rear, the decoration pays attention to closing the mouth, you must hide all the unsightly things, or cover them with edge banding, or other materials, and the appearance must be properly beautiful. This is another big problem for the future.
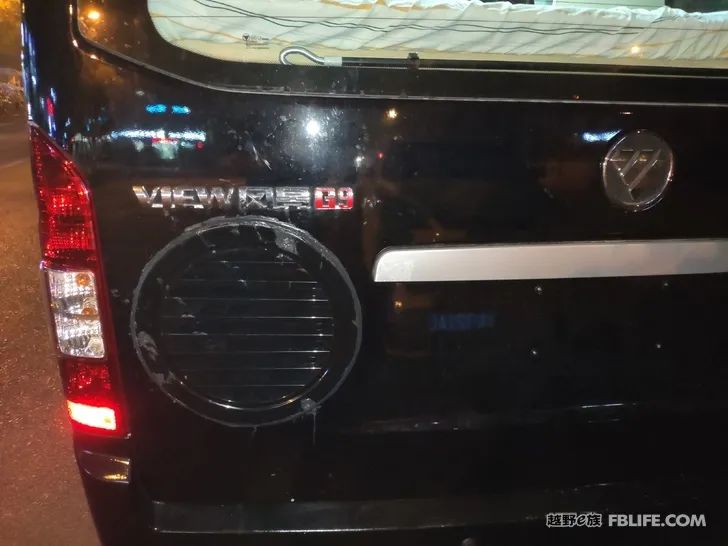
The air outlet at the rear of the air conditioner, the rear door and the panel are connected by an elastic air duct. This elastic air duct is a 40cm pipe similar to a range hood duct. I bought a one-meter length and compressed it to about 10cm. The thickness is used, the whole is full of elasticity, just as a soft link air duct, I always think of various strange ways to meet the needs. In addition, the air conditioner is made into a closed space with boards and foam glue in the car to ensure that heat exchange is only performed within the designed range.
After the overall introduction of the air conditioner, it is roughly like this.
After the air conditioner was installed, a lot of hard-to-close places appeared at the back. If the decoration can’t be done, it will be very ugly. Later, after thinking and designing, I still came up with some solutions to solve it.
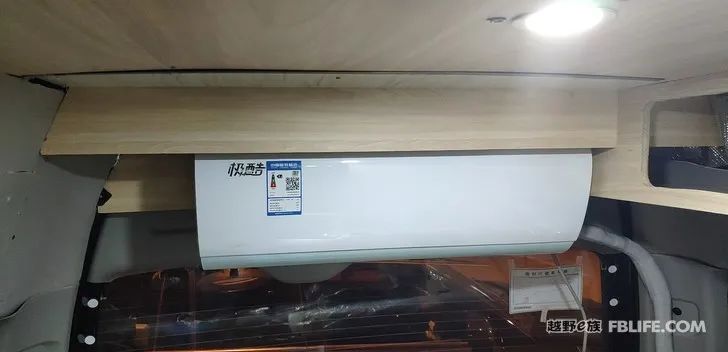
A panel is installed in front of the air conditioner, and a wall cabinet is installed on the right side, and then the bottom is sealed with a panel, and the panel is covered with leather, which basically solves the complicated closing problem at the rear.
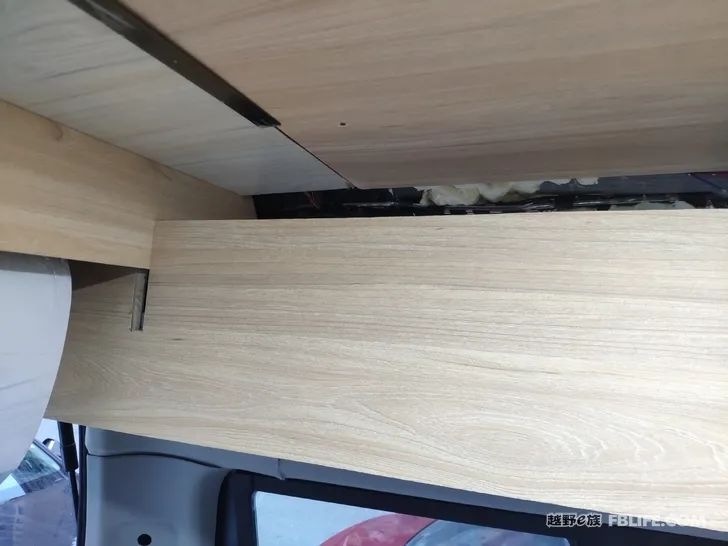
This is the process of trial installation, a board is ready to be stuck in.
The color of the top two boards is different purely because there is no board of the same color, and the same color board is not available in the market, so a board of another color is used, and a T-shaped aluminum decorative strip is used to cover the seam, and finally it looks very natural . Insufficient boards are not a problem with my budget. I actually bought more boards, but the color of the boards is different from what I imagined. As a result, the boards that were originally used as veneers were used as top boards, resulting in insufficient boards of a certain color.
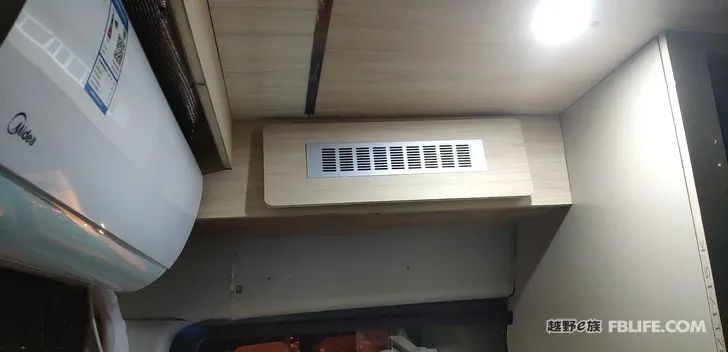
This is a picture taken during the construction process, without the foreskin. Basically, it perfectly solves the problem of closing the rear of the car. By the way, a large-capacity hanging cabinet was also made.
Okay, let’s move on to the decoration on the passenger side. I originally planned to use 7pcs board for the interior, because other people’s homes are made of 7pcs board, but this G9 car is too enchanting, and the degree of curvature of the internal surface is beyond my imagination. If I use 7pcs board, it will be covered forcibly It will lose a lot of interior space, so I remembered the interior panels I threw away. They were so messed up that I cut them unsightly, but I still picked them up and prepared to use them for the interior.
So I patched them up piece by piece with gun nails and put them in the car.
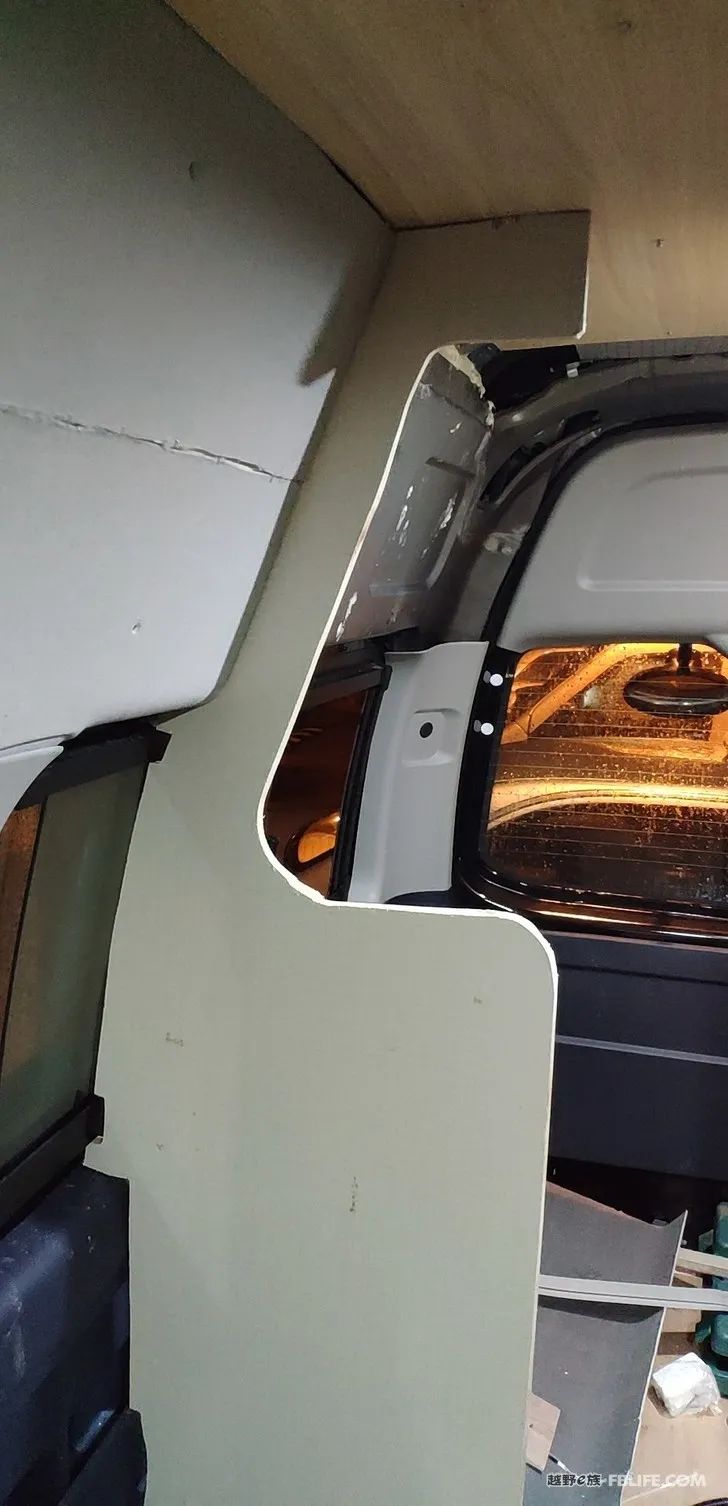
This is the picked up interior panel. It is still unwrapped after patching. There is one piece on the ground and another piece that has already been installed. Then using the foreskin technique I learned first, I wrapped him in leather.
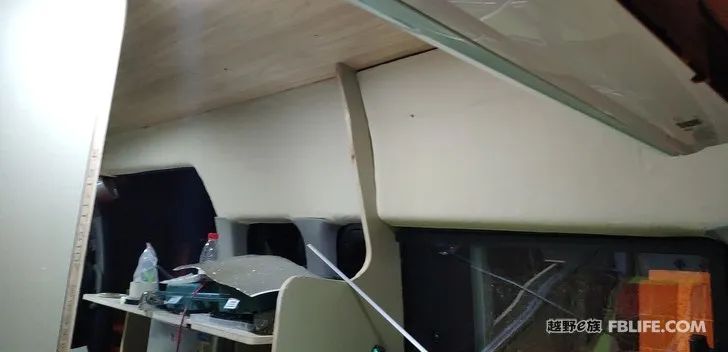
This is the state after the bread is finished. Is there no taste of picking up? I originally wanted to hire someone to do it, but they didn’t want to do such a small job, so I did it myself. The method is very simple, first spray glue, then cover the skin and it’s done. Some people say that glue is not environmentally friendly, but I only used a little glue. During the half-year-long construction process, I don’t know where the smell in the car went. My construction was too slow, so there was no smell after the decoration.
Continuing with my modification story, I have already mentioned the decorative panel on the passenger side. I think the G9 model, due to the complex internal surface and low height, is not suitable for any wall cabinets on the passenger side, so I directly use the original The veneer and the leather are also quite suitable, at least I feel that it takes up less space than directly using the board.
My decoration on the passenger side is relatively simple. I made a cabinet with a refrigerator in the middle.
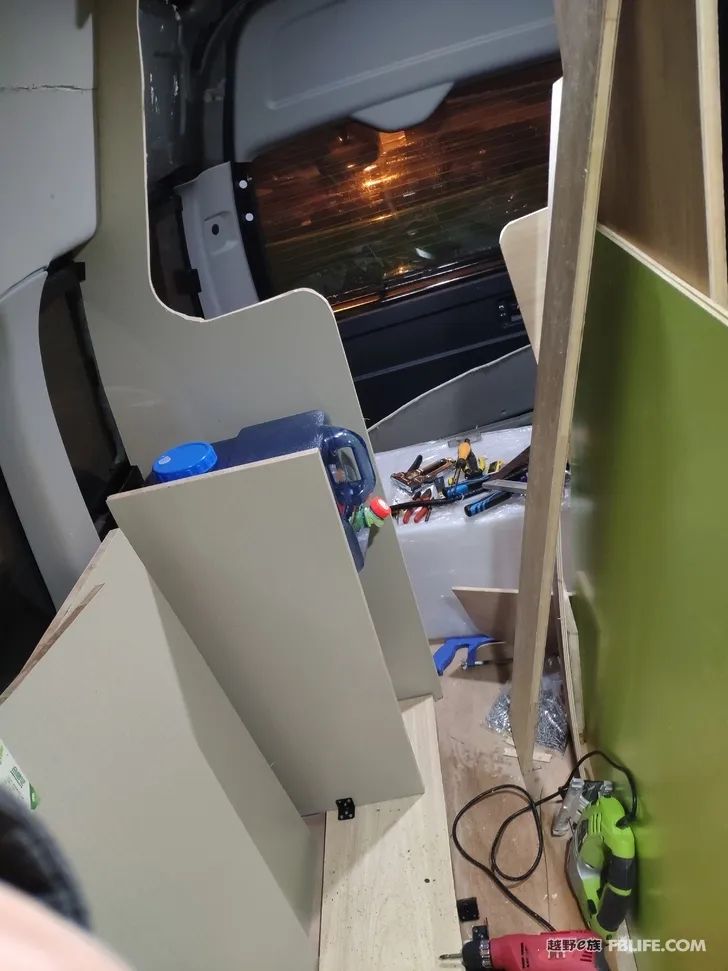
I didn’t weld a frame like others, because I don’t have welding skills, and more importantly, I don’t have a welding site. I fixed a wood panel directly through the ground, and then used corner pieces to connect the upright panels. The way to do this is simple, but also bound to be lazy. Because it is the first time I am doing woodworking, the level is really good, and occasionally the height is wrong. I really want to scrap this cabinet and redo it, but it hasn’t fallen apart yet, so I’ve been using it until now, and it doesn’t seem like it’s falling apart.
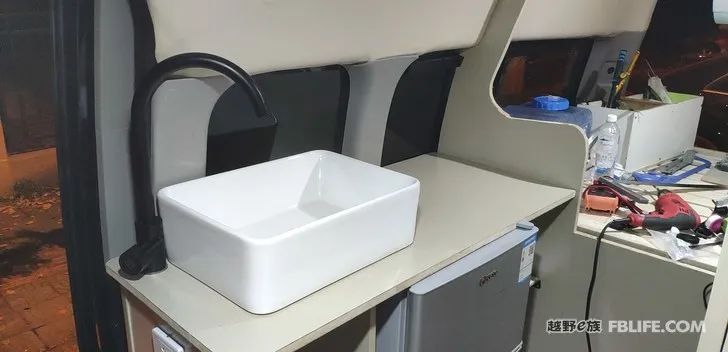
This is almost done, not yet bound.
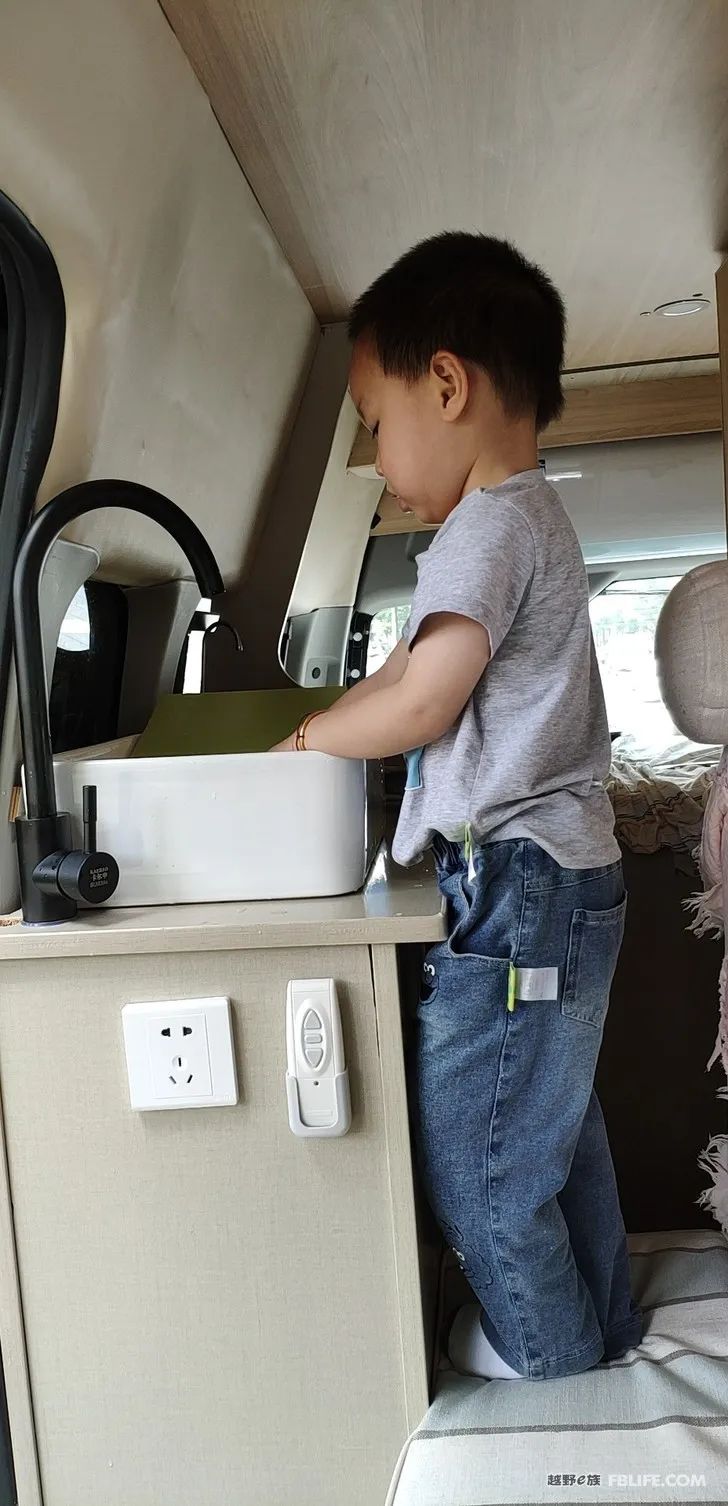
Here’s my son playing in the sink after it’s finished. The roughness of the carpentry can be seen. When I started using the electric circular saw, my hands would tremble, and then it would be crooked, and then there would be gaps. Since the boards were not prepared enough, I continued to use them. If I refit next time, I must buy a table saw, otherwise I won’t be able to do woodworking well. Learn first, use first, simple tools still can’t make good things.
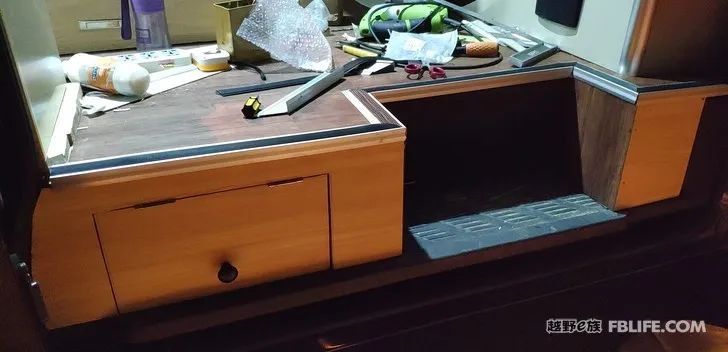
I am quite satisfied with my entrance design. I originally wanted to customize a stainless steel step like others, but the curved surface is really complicated. If I communicate online, I am afraid of errors. So I designed an entrance with wooden boards. It is not a tool box, but some on-board maintenance tools can be placed. During my long trip this time, I put the tools here, and if there is a problem, I can fix it at any time.
The edge-banding aluminum alloy above is for RVs. I bought 2 meters, and then cut it into a 45-degree angle (with a hand saw) and saw it directly. It was very hard to saw, because there is no aluminum alloy cutting machine with a 45-degree angle, so The seams are not very tight.
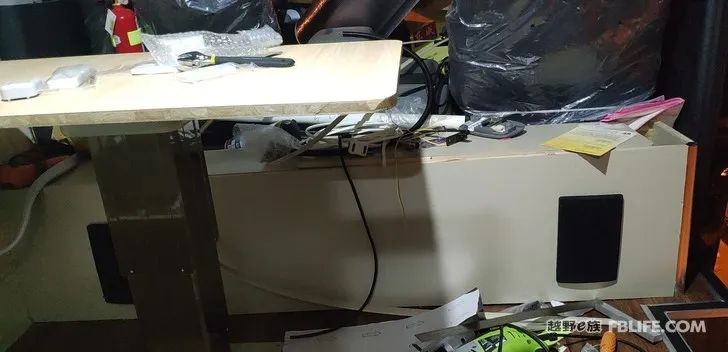
At the front of the car, I made a floor cabinet (30cm high, 55cm wide at its widest point, and 165cm long), which can be used as a stool or put things on. I dug 2 sound holes on the base cabinet. Then I bought a pair of 4-inch passive speakers online. Note that they are speakers, not speakers. For this pair of passive speakers, I bought a total of 3 power amplifiers.
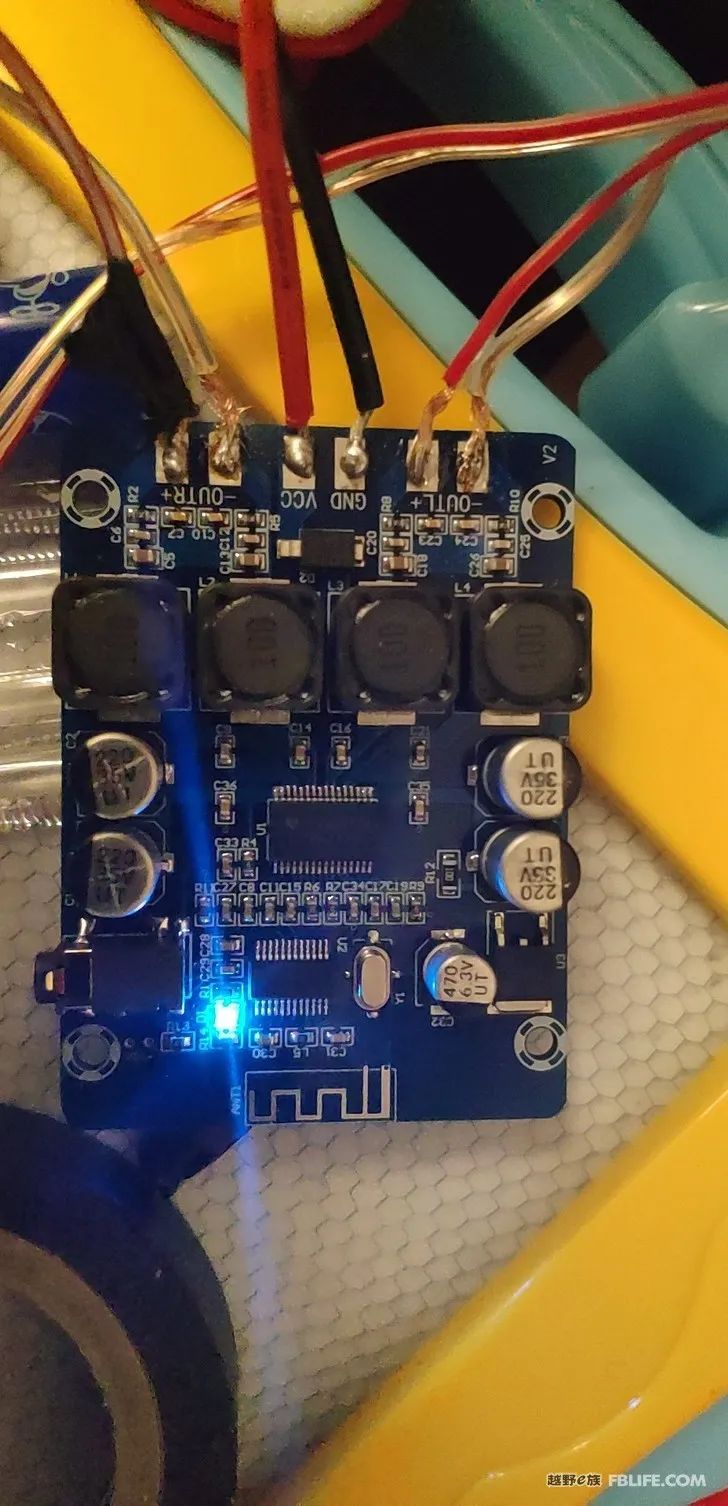
This is the first digital power amplifier I bought, with its own Bluetooth, connected to my speaker, and started listening directly during the decoration. But because it is a cheap digital power amplifier, I always feel that the sound is not good. Then it was thrown away. I heard from netizens that the sound quality of 1969 is very good, so I bought the power amplifier below.
It was later discovered that this was not the authentic 1969, but the 1969M of the field effect tube, but after the first connection, the sound was obviously higher than the digital power amplifier, definitely a higher grade. So I listened to it for 7-8 months, and suddenly one day, I felt that the sound was uncomfortable in the bass, so I placed an order to buy the authentic 1969 module and radiator case.

The 1969 and 1969M are indeed different, but the efficiency is low and the heat dissipation is huge. The huge radiator chassis below must be used to dissipate heat, and it is so hot that you can cover your hands in winter.
The sound of 1969 is really good, because I haven’t heard better speakers and power amplifiers, so my speaker system is like this so far, and I don’t want to mess with it for the time being.
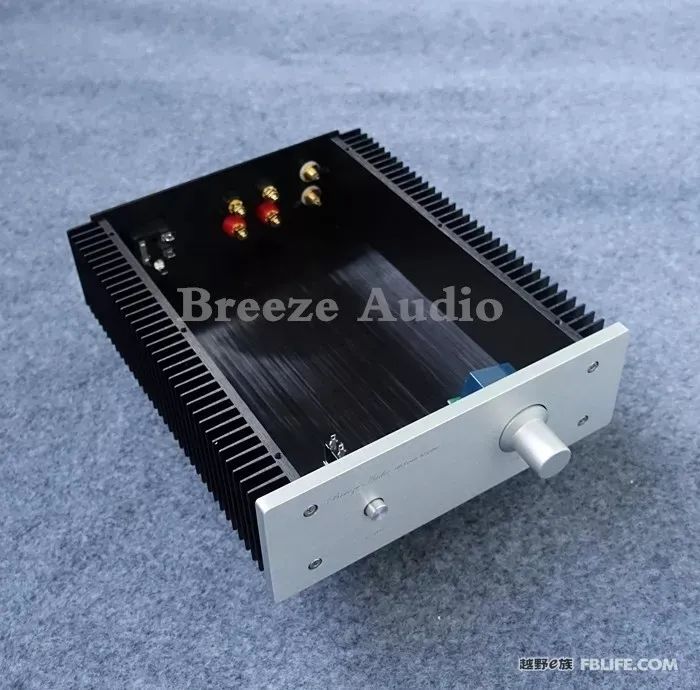
Fasten the board into this case. I run it directly from a lithium battery, so no need for a traditional ring cow. Such a huge chassis is empty with 2-way 1969 power amplifier circuit boards. It feels that the chassis is purely for heat dissipation.
Around the car, the introduction has been completed, and then I will talk about the selection and production of my seat.
Originally, I planned to use the Mercedes-Benz disassembled seat for comfort, but after I bought it, I found that the size was too large. I have a 5-seater, and I need to put 3 seats in the back. After putting it, there is no way to go. If it is a 4-seater, I can buy this kind of seat, but I can’t do it now. So the seat I bought was sold again.
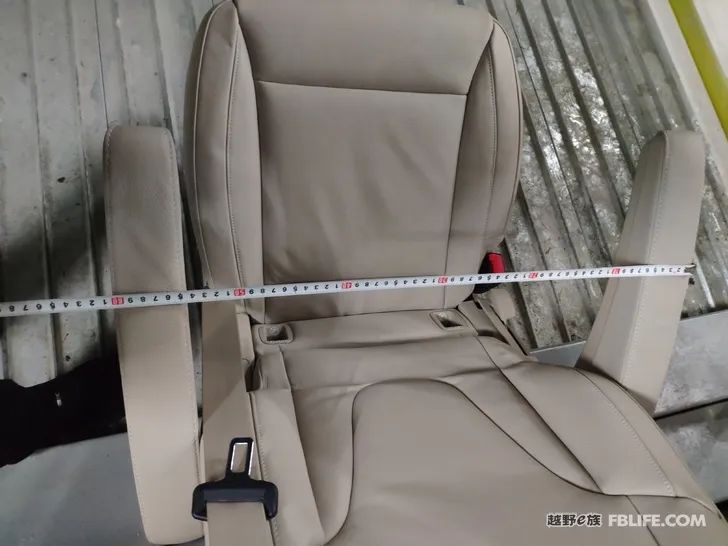
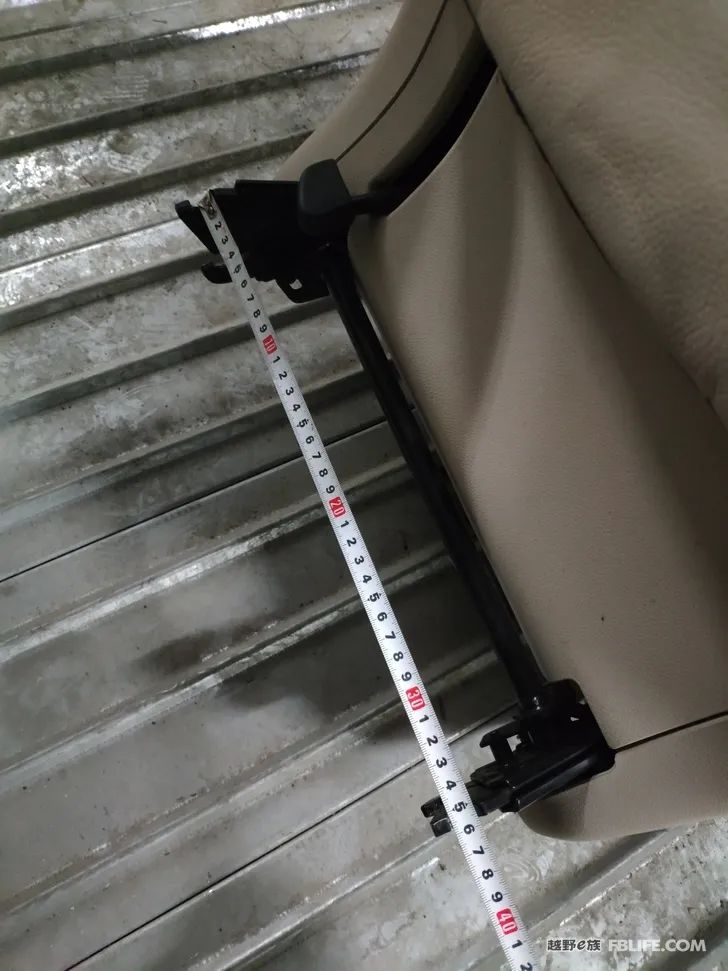
After measuring the size, there is no room for 3 seats.
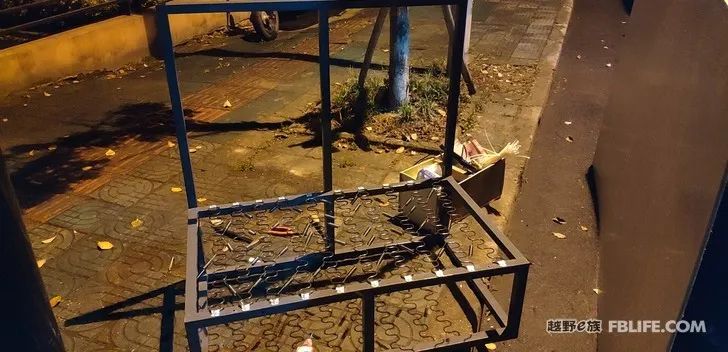
So I went to the Internet to search for how to make a sofa. Although the Internet is about making wooden sofas, I am going to make an iron sofa now, but the principles are similar. I bought a snake-shaped spring, a special buckle, and a balance spring (a spring that is pulled horizontally between the snake-shaped springs) from a certain treasure, and started DIYing a sofa.
The size of the seat is 30cm in height and 100cm in width, but the cushion is made to be 110cm, because the car wall is curved, you can’t get close to the car body completely, so there is still a gap of 10cm from the standard 120cm3 seats, so I made it on the side wall A folding bracket was installed, and the bracket was turned up during the vehicle inspection, and the 2 seats became 3 seats. It is not usually used, because there are at most 4 people when going out, and the best type B RV is 2 people, at most 2 big and 2 small (it is already very crowded). Those who have to sleep more than 4 people will have their brains squeezed.
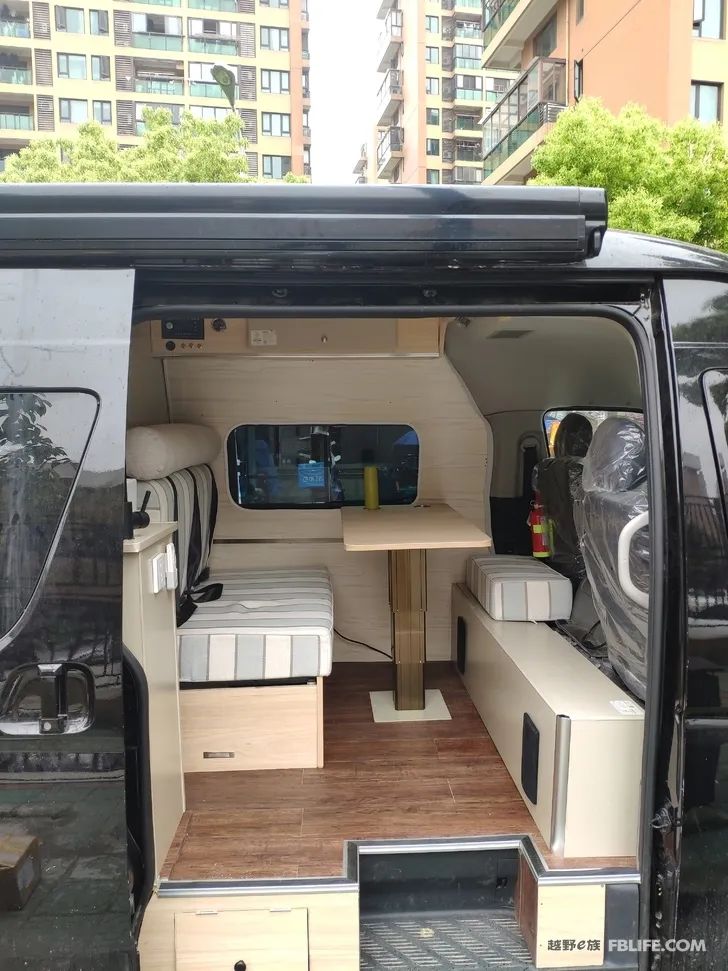
From this picture you can see my folded seat panel and a piece of cushion used to fold the seat. The hidden pull buckle can be folded up with one pull, and the bracket claims to be able to support 150 kg.
My wife likes to be clean, and the seats are usually padded with other fabrics. This seat is very good, because my sofa cushion is very thick, with a depth of 60cm. When I work in the car, I can sit cross-legged.
Finally, let’s talk about my circuit system. I use a 24V system for the circuit. The reason is that the efficiency of the 12V system is too low, and the 48V system is a little troublesome, so I use the 24V system as a compromise. All internal low-voltage electrical appliances are powered by DC. Only the air conditioner and refrigerator are powered by inverters.
The circuit belongs to the part that I understand relatively well. Although I am terribly timid, relatively speaking, I understand the principles, but I have never operated it.
First, connect a wire from the generator to the driving charger. I take electricity directly from the positive pole of the battery.
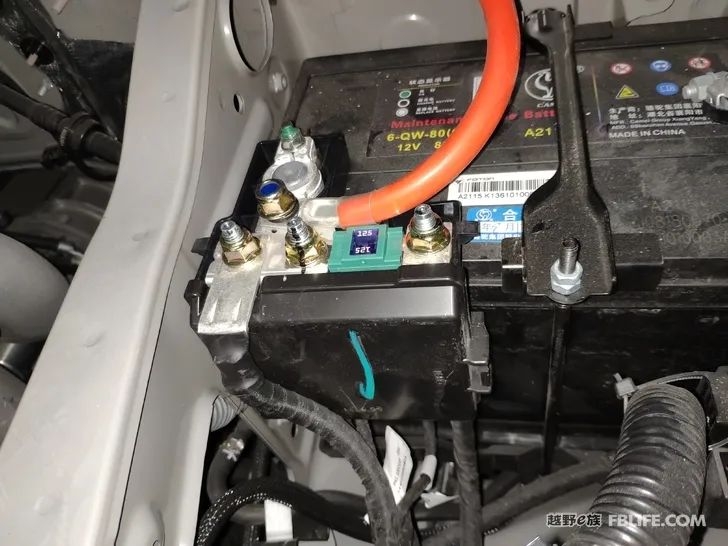
A custom-made cable, according to the size of the screw opening, tell the seller how many big screw holes I want, and the direct line will be made for you. I bought 1.5M with only a little bit of redundancy. I basically calculated the size and customized it, because if it is too long, the resistance will increase.
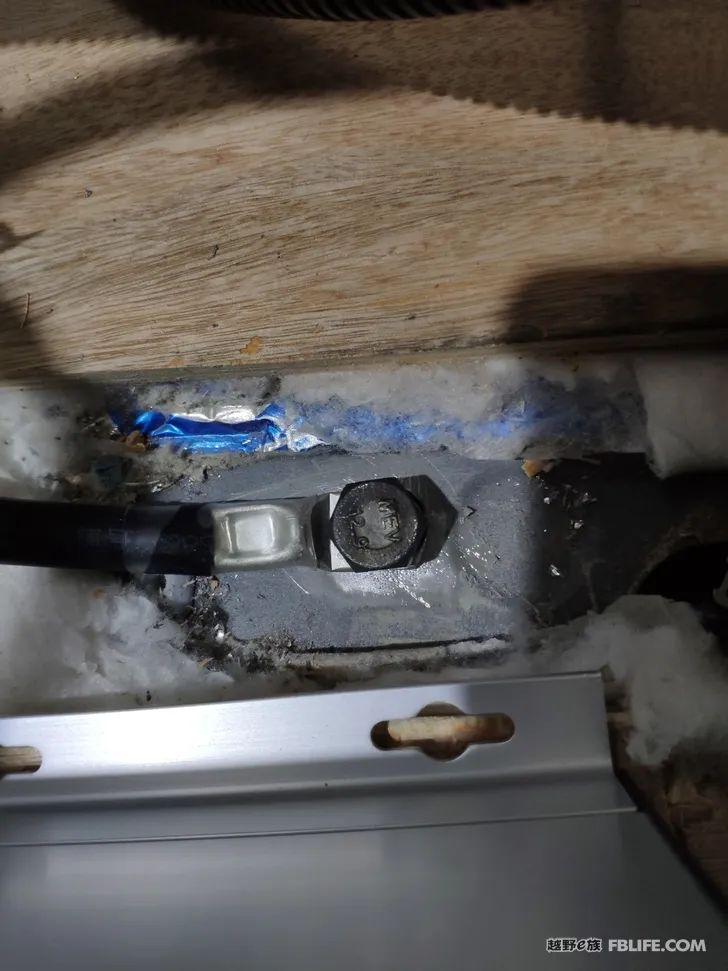
Then a hole was made in the car for grounding. When grounding, a spring washer must be used, otherwise it will be easy to loosen. The consequence of looseness is that the resistance increases, which may cause heat and fire, so spring washers must be used. And I suggest that this position should be checked every 5000 kilometers. Just like daily maintenance.
My driving charger has built-in isolation function, so there is no need for a separate battery isolator. The driving charger directly boosts the voltage from 14v to 28v, and then charges the battery. I will not take specific pictures. . The driving charger I bought is a charger from a senior in the forum, it seems to be called “Forget Mimi”, 850 Dayang, and the quality is not bad.
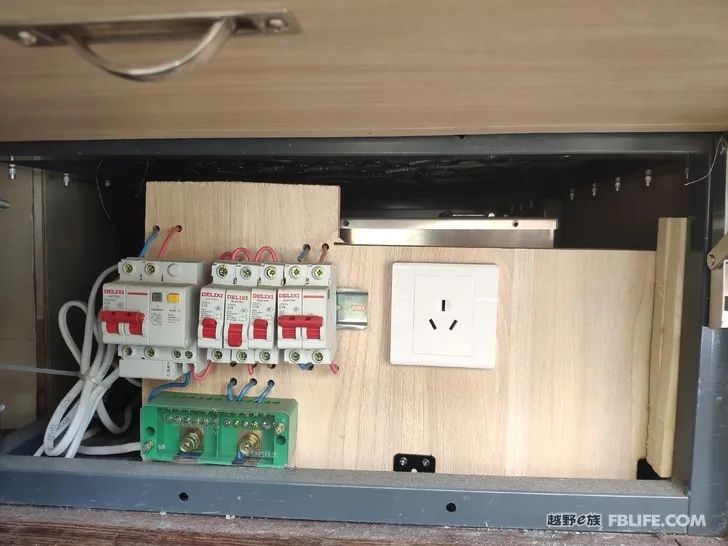
These things are all installed under the seat and on the opening of the seat. When you open the folding board of the extended seat, you can see the strong power part.
After the inverter comes out, first enter the circuit breaker, and then carry out the distribution of each channel.
A 16A socket is added next to it for the input of external power. I have equipped a cable by myself, which can be charged where there is mains power, but it is basically useless.
[The content comes from the off-road e family community]
Author: Digital Herdsman
Link: http://bbs.ucar.run/thread_14751170_1_1.html


