
After the high temperature test during this period, Gege’s parking air conditioner has been completely successful, Xiaoniao specially published a separate summary to thank the car fans for their support.
Retrofit central air conditioner
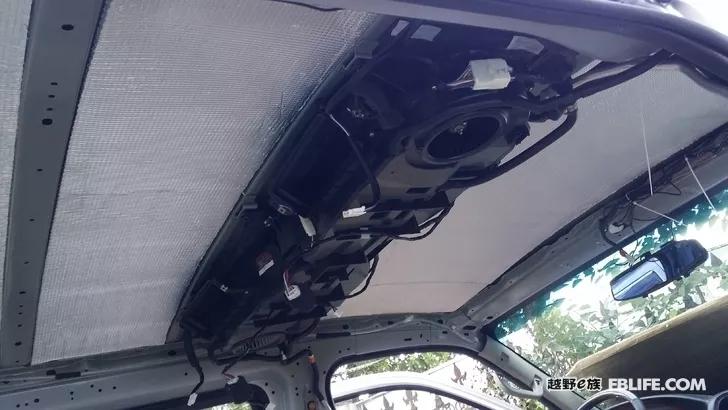
Remove the roof, change the internal unit of the original car’s central air conditioner to be powered by a secondary battery, and install an electronic expansion valve to adapt to the inverter compressor.

The refit was completed to restore the ceiling interior.
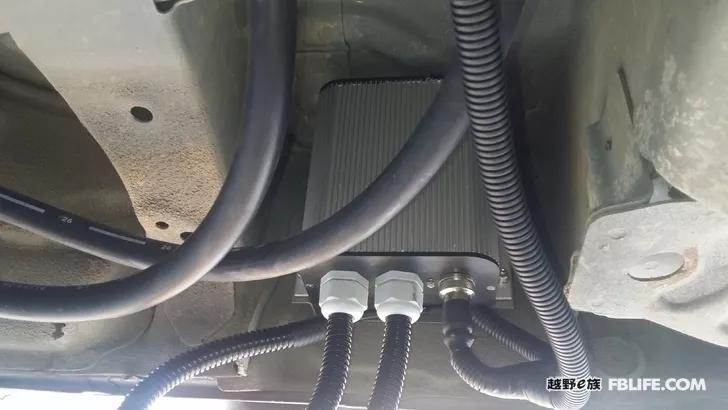
Install the condensing heat exchanger
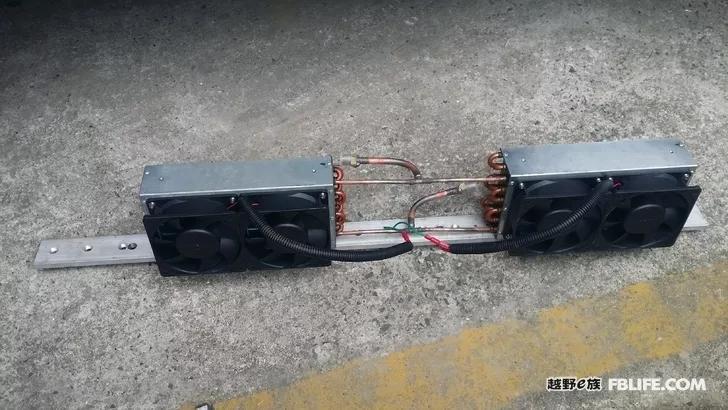
In view of the limited height of the vehicle bottom, two heat exchangers were specially customized and installed in parallel on an aluminum hanger to form an assembly to adapt to the large gas transmission characteristics of R134a refrigerant.

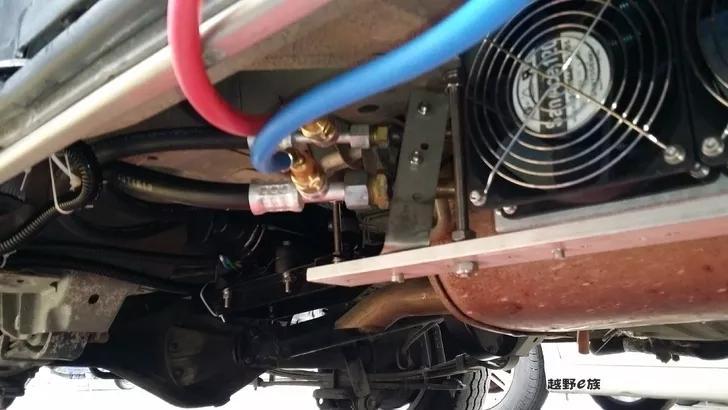
Hoist the condenser assembly on the right side of the bottom of the vehicle near the side door.

Using 4 large-diameter violent fans,
Driven by DC variable frequency.
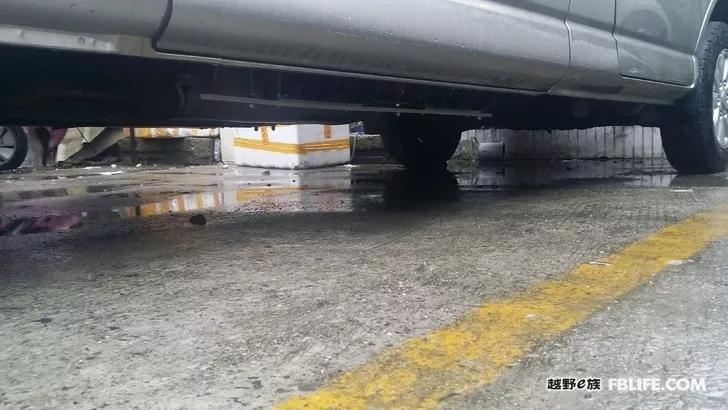
The minimum height is higher than other parts of the original car,
It is barely visible from outside the car.
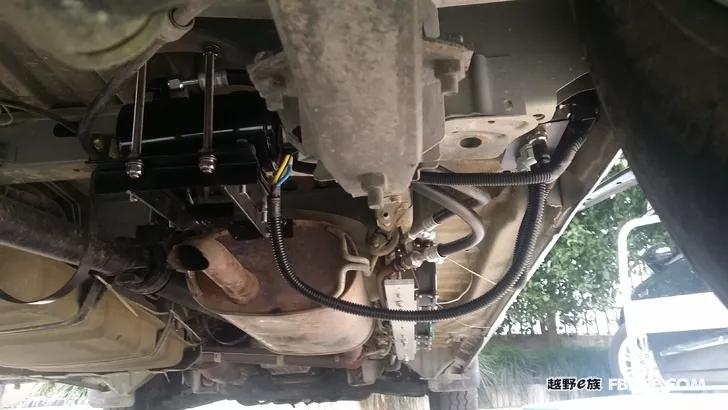
Install 12V DC Inverter Compressor
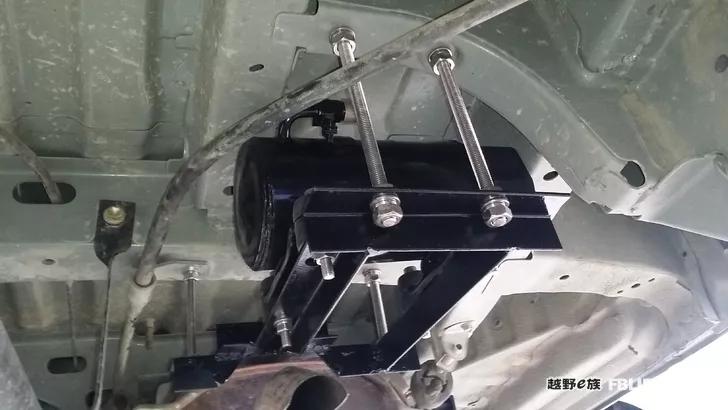
Pull rivet nuts on the frame and fix a bottom frame with screws.

A 12V DC frequency conversion dual-rotor compressor is hoisted on the bottom of the vehicle.
The reason for adopting the dual-rotor compressor is to take a fancy to its high energy efficiency ratio under the condition of small displacement, but compared with the scroll compressor, the constant discharge pressure requirement also increases the difficulty of setting the electronic expansion valve, and at the same time Its vibration is also higher than that of the scroll compressor, so a shock absorber has been remade in the later stage, and the one-dimensional shock absorption in the picture is changed to two-dimensional shock absorption, so that vibration and noise are well isolated.

Install piping from the compressor to the condenser.
Install 12V DC inverter controller
First, install the compressor power supply control circuit and the inverter controller installation frame in the channel reserved by the original factory on the right.
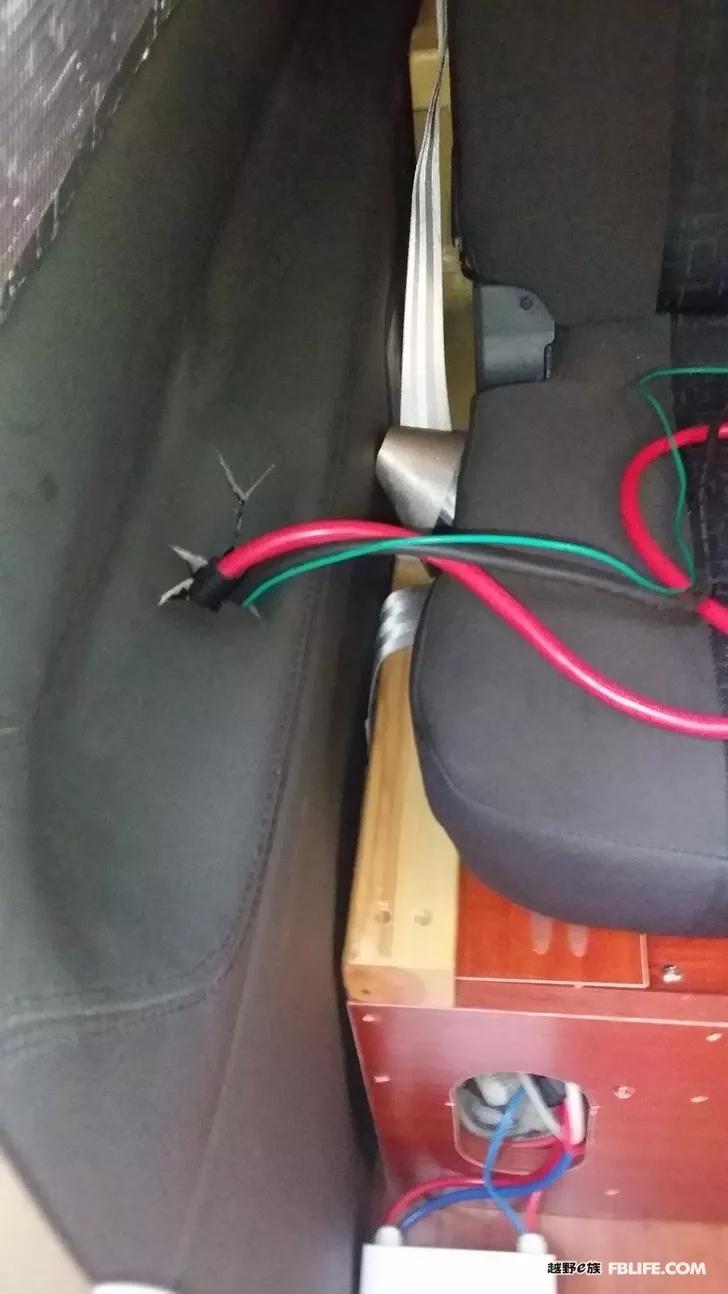
Then run the cable through the side wall and into the compartment.
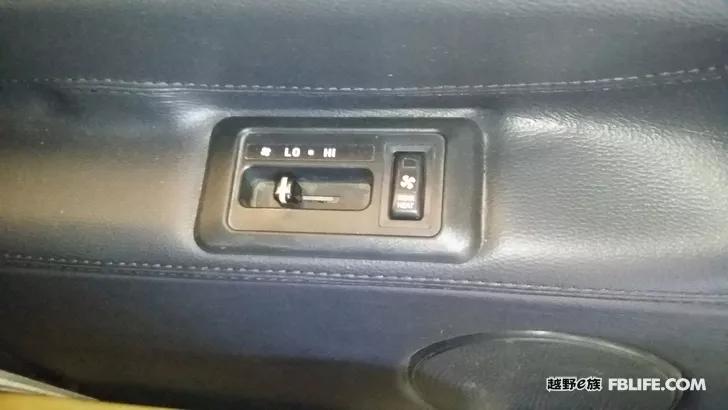
Install an original factory control board for debugging.
Install the low-voltage DC inverter controller on the mounting frame.
Connect the circuit between the low-voltage DC inverter compressor and the controller.
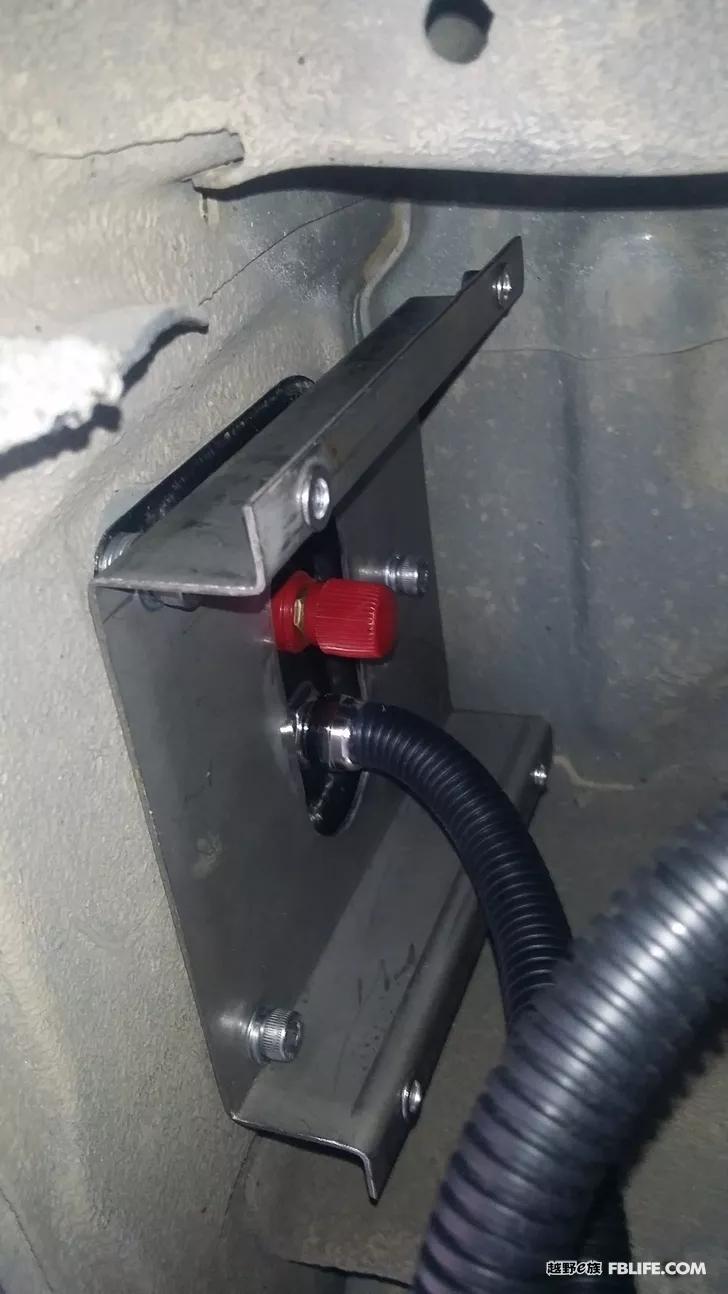
Install the storage bottle, desiccator
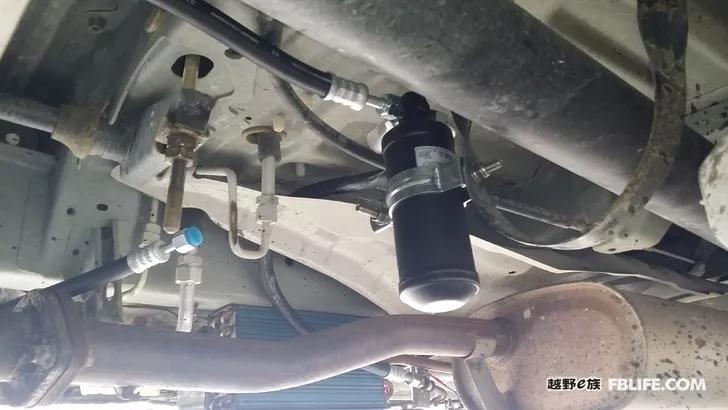
A reservoir bottle is installed under the vehicle.
And this dry bottle.
After disconnecting the original car, the evaporator is connected to the parking air conditioner
First pump the refrigerant in the original car air conditioner into a liquid storage bottle that has been evacuated in advance.
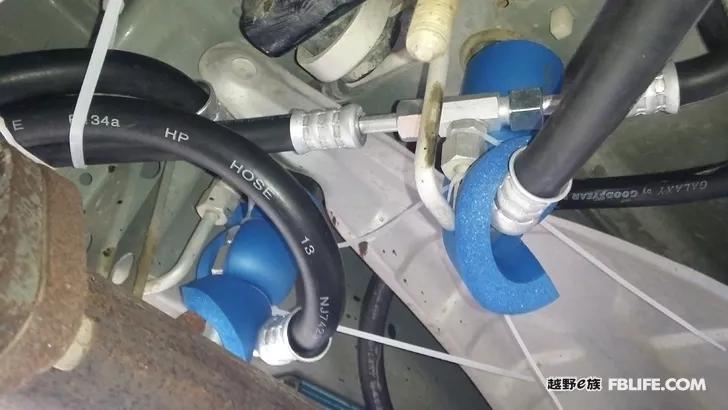
Then disconnect the rear evaporator of the central air conditioner and connect it to the parking air conditioning system.

The finished air conditioner pipeline.
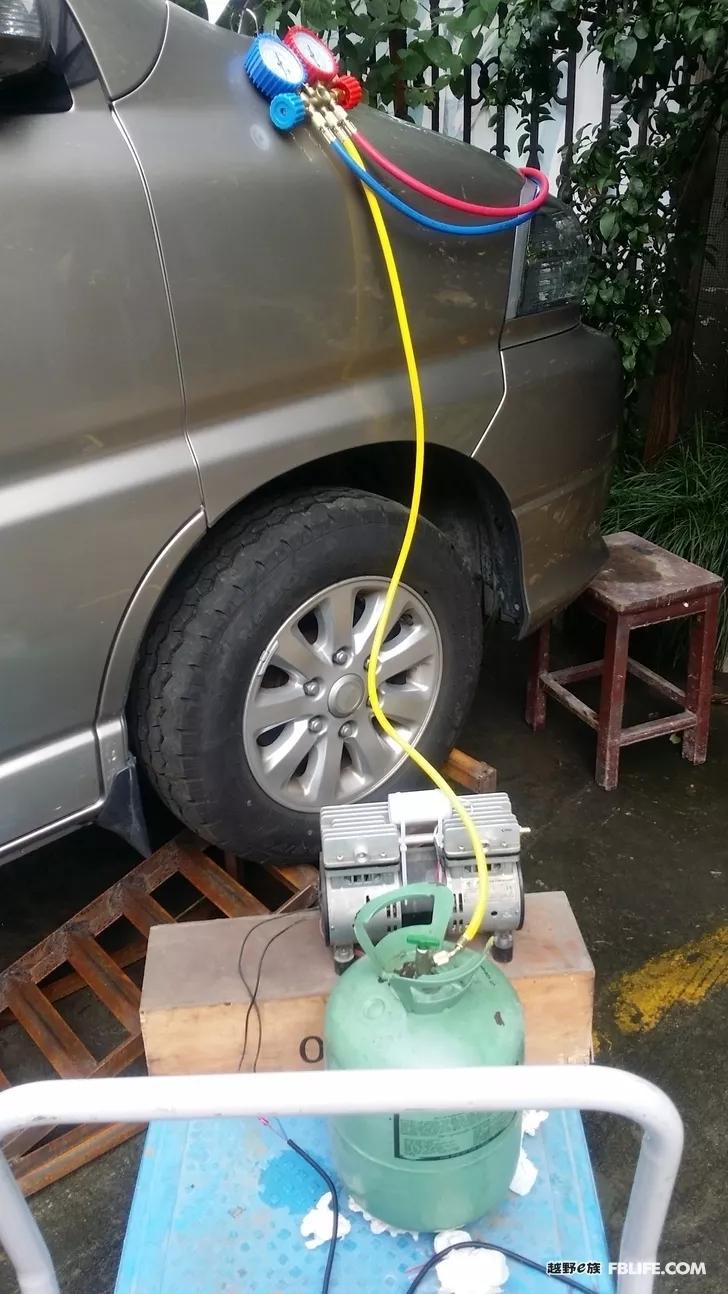
Refrigerant filling for driving air conditioner
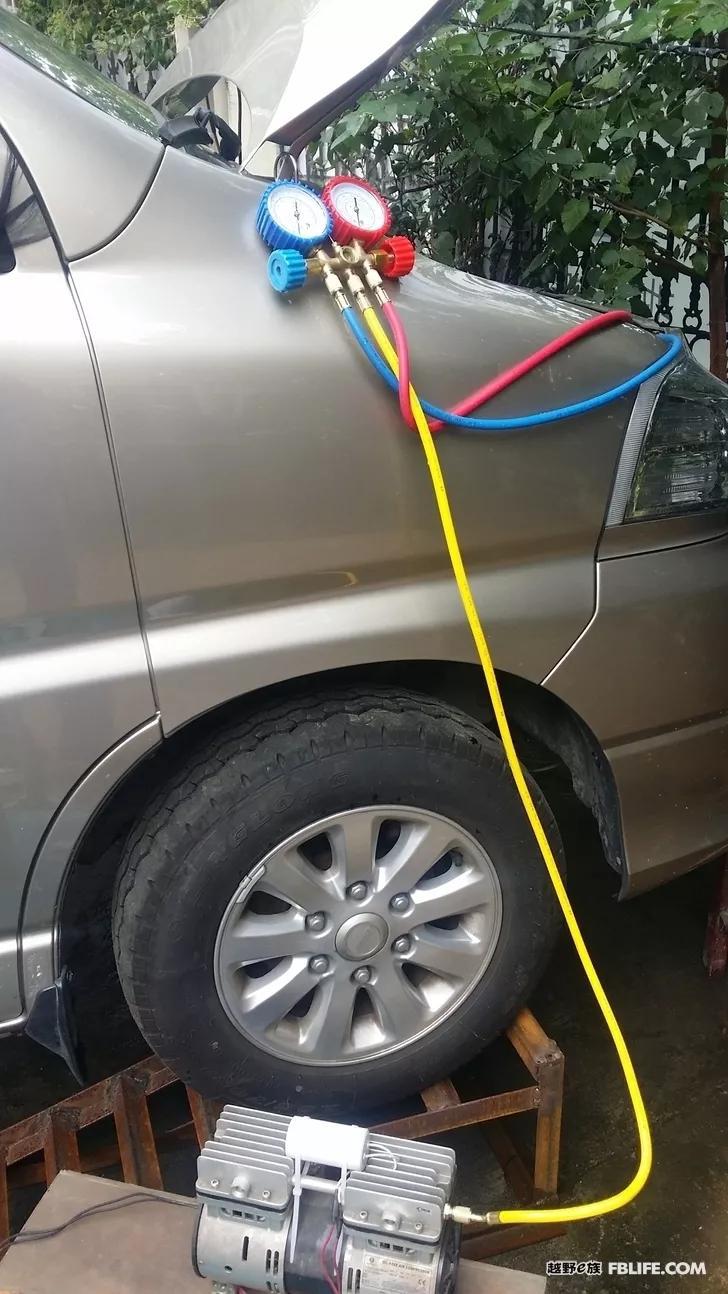
Driving (in front of the original car) the air conditioner is vacuumed.
Add refrigerant.
Refrigerant filling for parking air conditioner
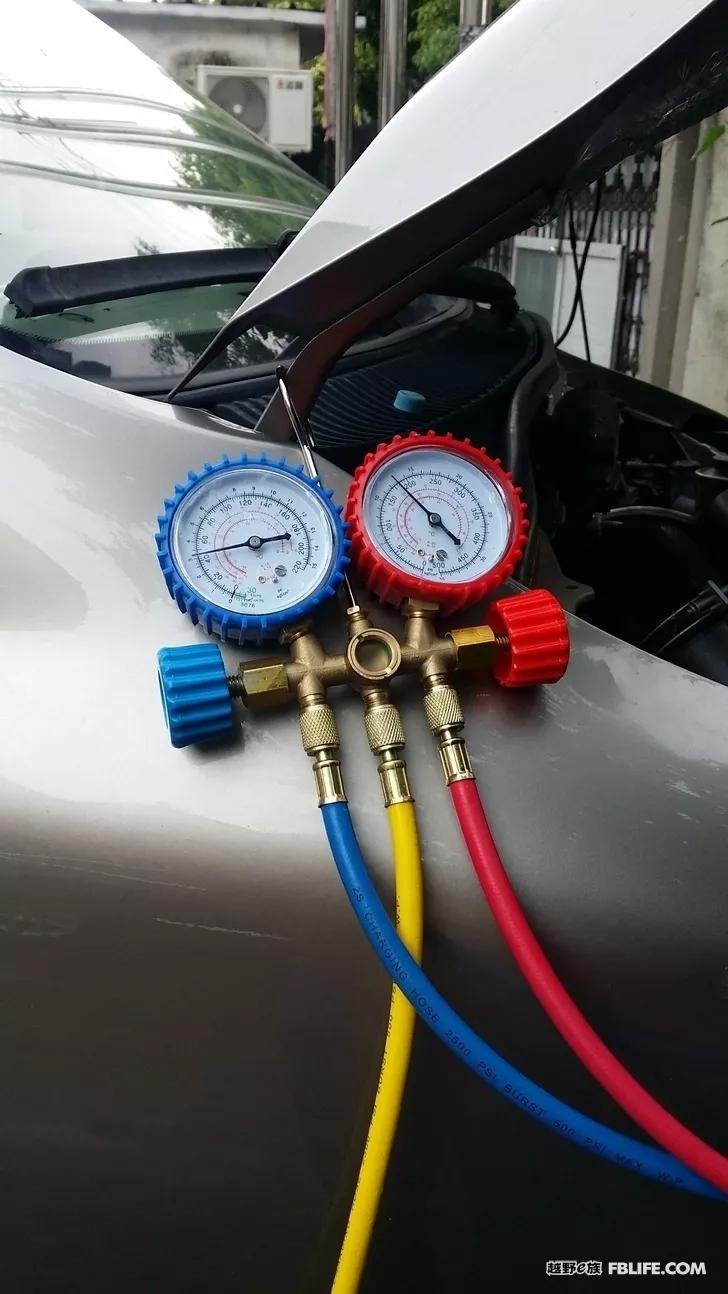
Connect the liquid adder to the high and low pressure ports of the parking air conditioner.
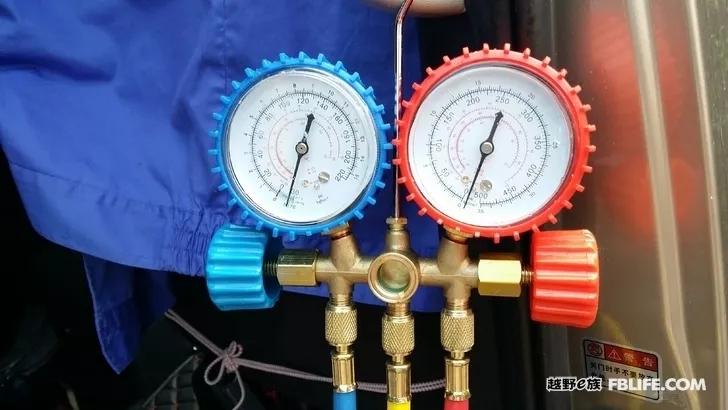
The parking air conditioner is vacuumed.
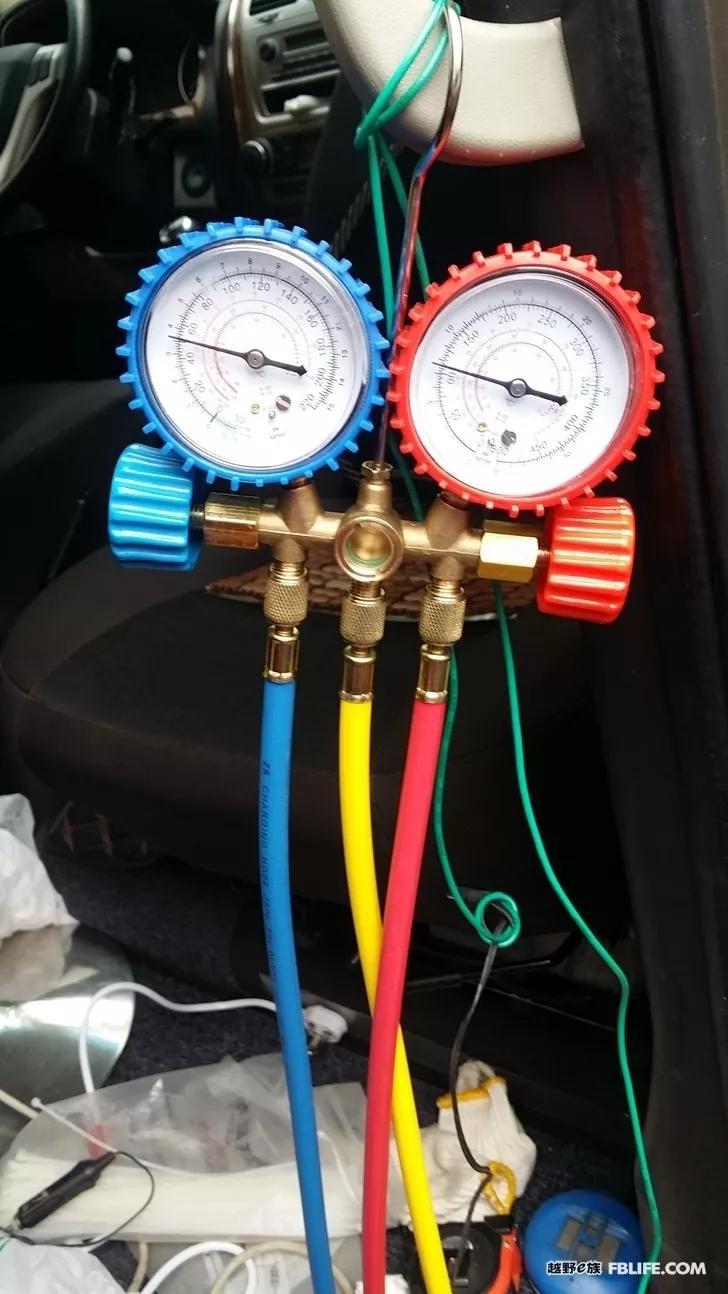
Add refrigerant according to the design.
While the parking air conditioner is filling the refrigerant, adjust the high and low pressure according to the design to meet the requirement of 12V200Ah (12V280Ah battery is calculated according to 70% discharge rate) for 10 hours.
Adjust the power of the air conditioner to meet 200Ah to work for 10 hours.
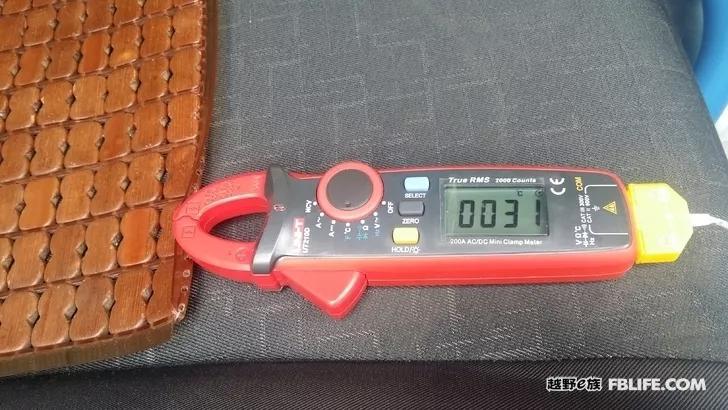
The air inlet temperature is 31°C.
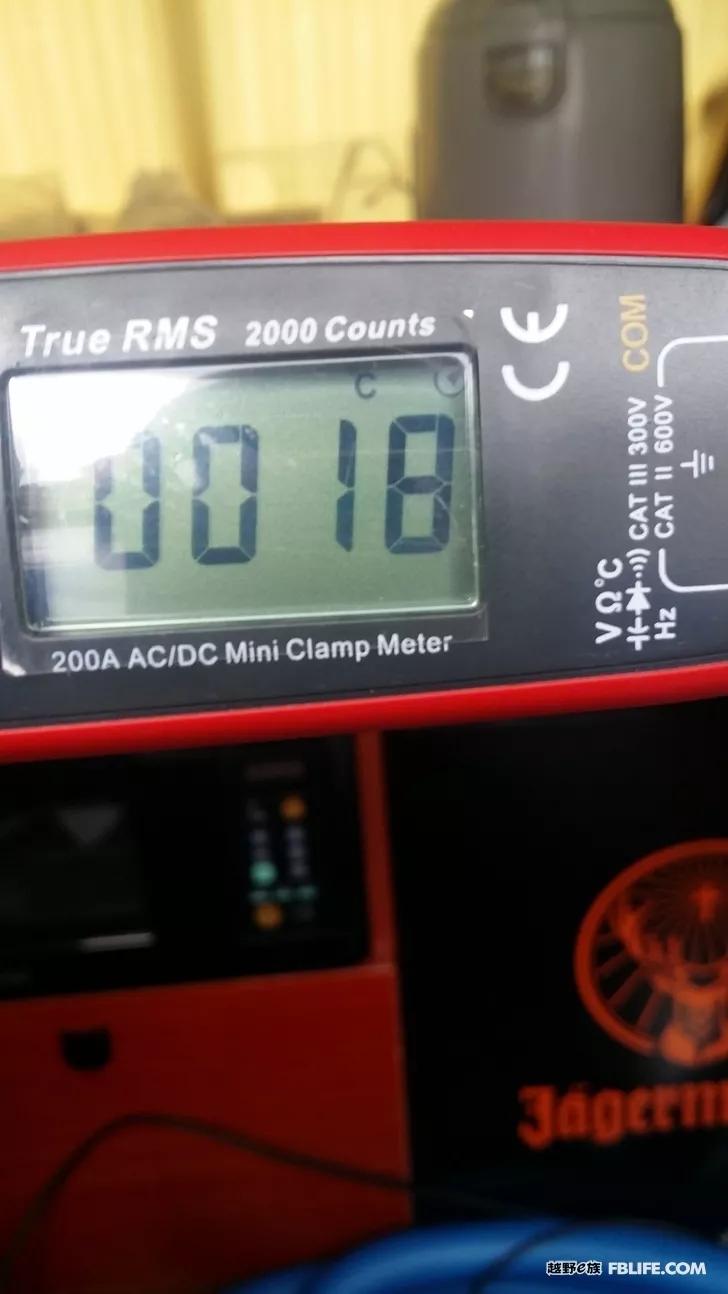
The air outlet temperature is 18°C.
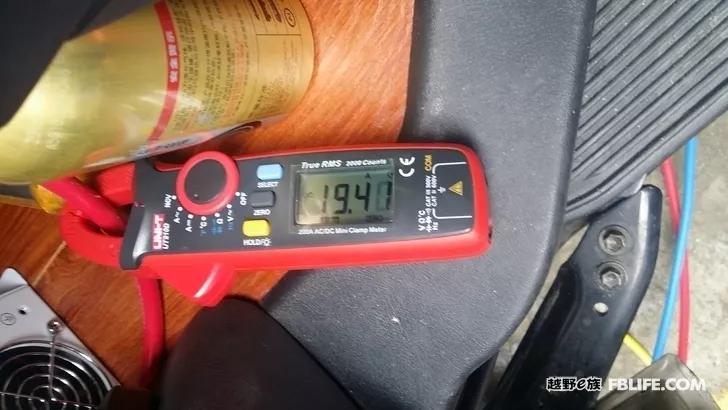
The operating current is 19.4A.
The air conditioning parameters are actually tested, and the cooling power and energy efficiency ratio are calculated using the enthalpy difference method.
The suction and exhaust temperatures and pressures, the inlet and outlet temperatures of the condenser and evaporator, and the compressor speed were measured respectively.
Since the inlet temperature of the condenser is the same as the exhaust temperature, and the difference between the outlet temperature of the evaporator and the temperature of the suction port is less than 0.1 degrees, the data t1/P1 and t2 of the four points of suction, exhaust, condenser outlet and evaporator inlet are taken /P2, t3 and t4, and P3=P2, P4=P1, h and V are the theoretical values of R134a, the air delivery speed is calculated according to the compressor speed and displacement, and the refrigerating capacity is calculated by the enthalpy difference method and measured at the same time Power supply voltage, compressor current and fan current, calculate energy efficiency ratio.
Theoretical power ratio
ω=h2-h1
14.75
kj/kg
Cooling capacity per unit mass
qs=h1-h4
158.06kj/kg
Refrigeration coefficient
cop=qs/oh
10.72
Gas delivery speed
S=displacement/V1
0.008788kg/s
compression power
P0=S*oh
129.6195w
Heat pump power
Pr=S*qs
1388.994 w
voltage
U= measured 12.6v
compressor current
I1=measured 21.1a
Fan current
I2 = Measured 3.99a
Compressor power
P1=U*I1
265.86w
Total system power
P=U*(I1+I2)
316.134w
Cooling power
Pc=Pr-P1
1072.86w
EER
EER=Pc/P
3.393687
Calculation results: The power consumption of this air conditioner in the sun is 316w, the cooling capacity is 1073w, and the energy efficiency ratio is 3.4.
Then move the car to a cool place, adjust the fan to keep the refrigeration cycle working condition unchanged, measure the power supply voltage, compressor current and fan current again, and calculate the energy efficiency ratio.
Theoretical power ratio
ω=h2-h1
14.75kj/kg
Cooling capacity per unit mass
qs=h1-h4
158.06kj/kg
Refrigeration coefficient
cop=qs/oh
10.72
Gas delivery speed
S=displacement/V1
0.008788kg/s
compression power
P0=S*oh
129.6195w
Heat pump power
Pr=S*qs
1388.994 w
voltage
U=measured
12.8v
compressor current
I1=measured 19.21a
Fan current
I2=measured 2.54a
Compressor power
P1=U*I1
245.888 w
Total system power
P=U*(I1+I2)
278.4w
Cooling power
Pc=Pr-P1
1110.594w
EER
EER=Pc/P
3.989202
Calculation results: The power consumption of this air conditioner in the shade is 278w, the cooling capacity is 1111w, and the energy efficiency ratio is 4.0.
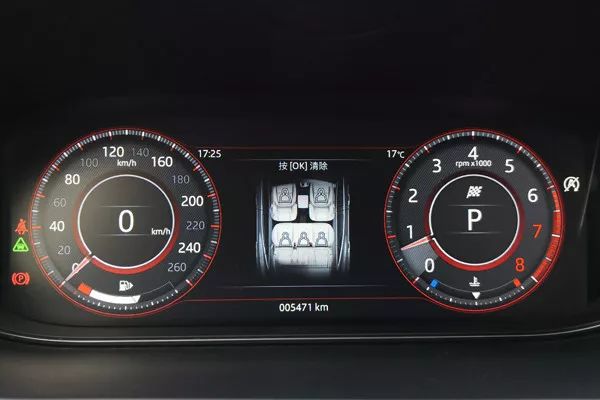
The actual measurement of the parking air conditioner in the hot summer and high temperature night.
After more than half a year, we finally came to Shanghai, the hottest day this year. The temperature at night was still hovering around 35 or 6°C. The air conditioner in the room showed a (inlet) temperature of 31°C. It was a good day to check the parking air conditioner. After driving more than ten kilometers from the house, I came to the factory (Gege parked here). After turning on the parking air conditioner and sorting it out, I took pictures with my mobile phone and recorded as follows:

The starting battery voltage is 12.7V (forgot to take a photo, took a replacement).
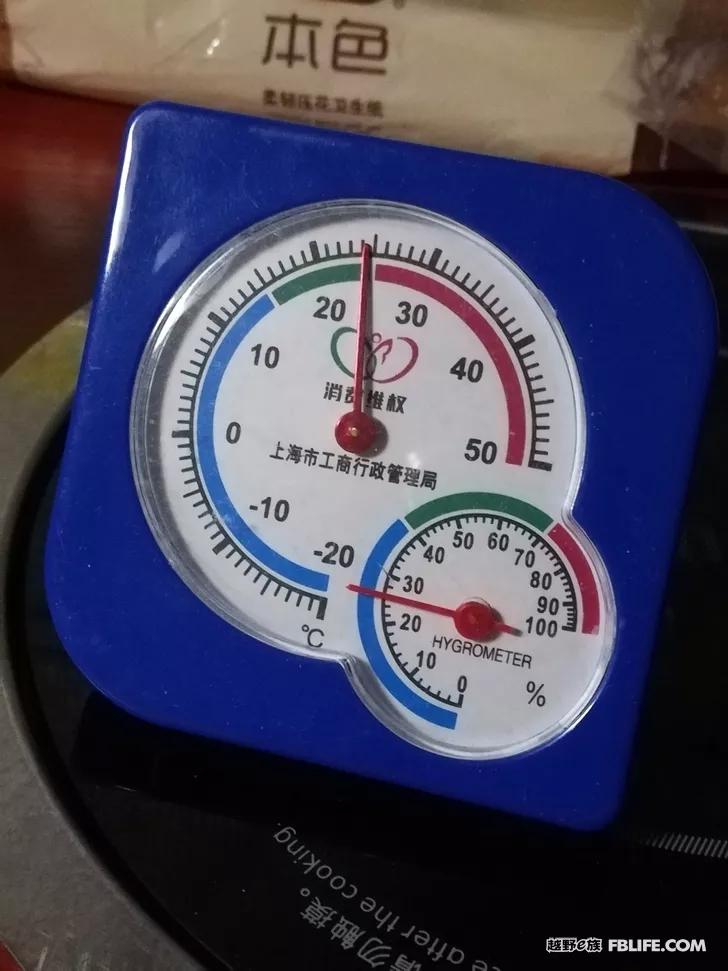
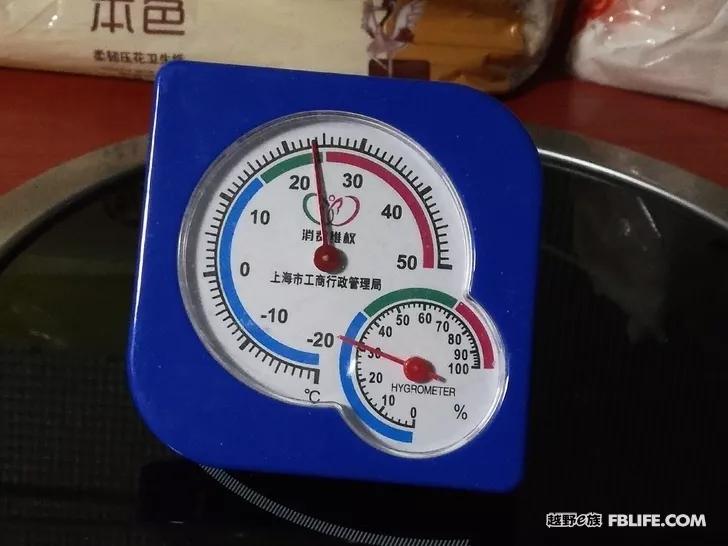
The temperature inside the car is 24°C.
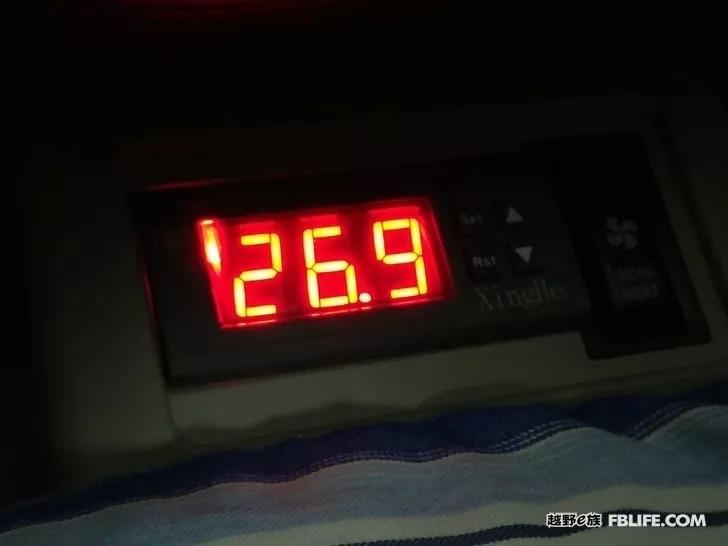
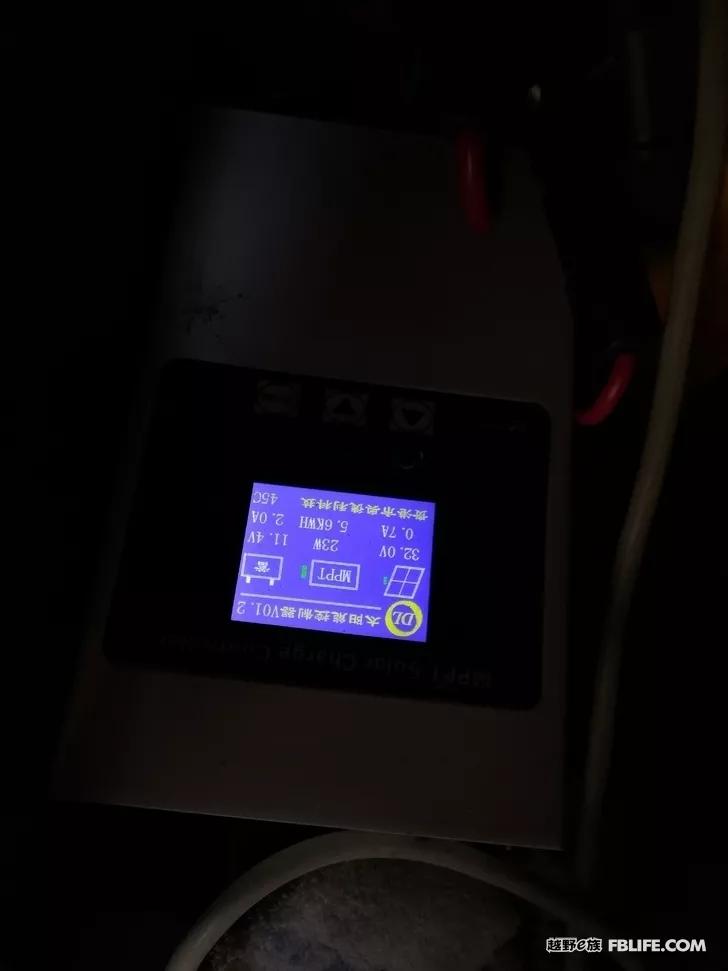
Air conditioner inlet air temperature is 26.9°C. (This is to use a ready-made temperature control shell and display screen to make a frequency conversion control panel by myself, and write the control code according to the data obtained from the previous debugging, so as to uniformly control the compressor, electronic expansion valve and fan)
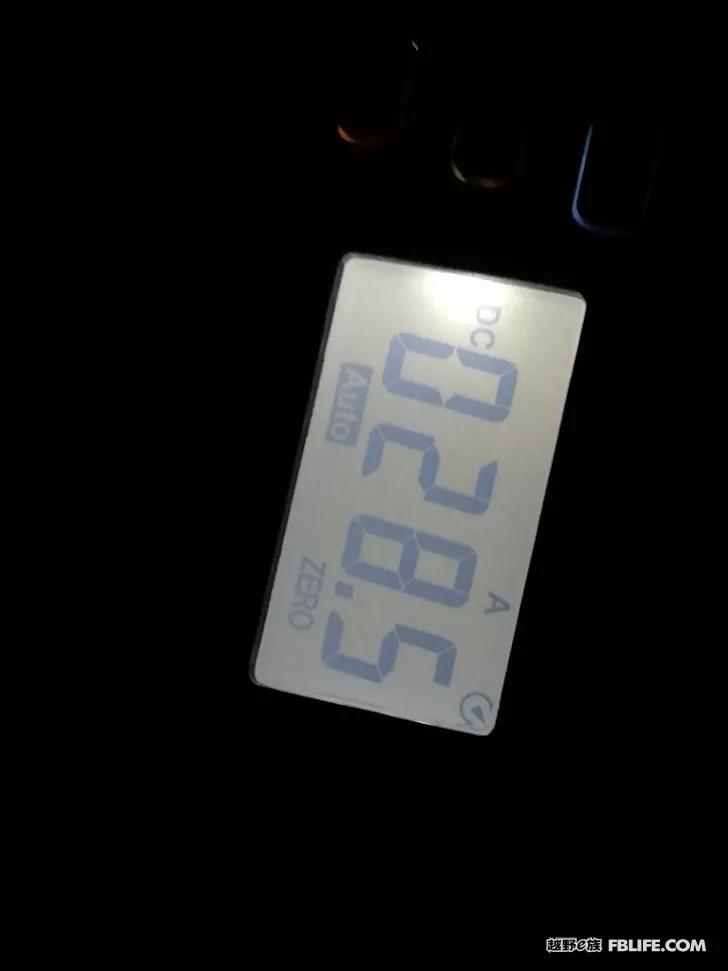
The operating current is 28.5A.
After working for half an hour, the temperature inside the car was 23.5°C.
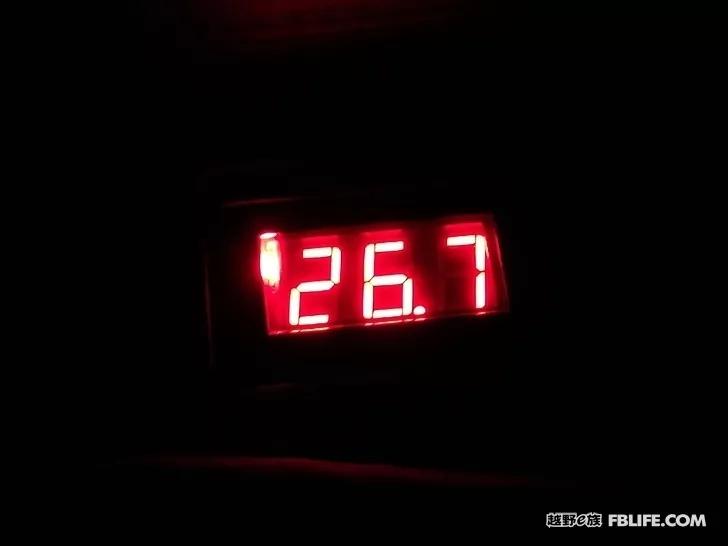
The air inlet temperature is 26.7°C.

The operating current is 21.59A.
Calculation of power consumption of air conditioner for one night
My car is not equipped with a coulomb meter, so I can’t calculate it accurately. I only know that when I turn it on at night, the voltage is 12.7V, and the inverter panel shows 84% of the power. In the morning, the voltage is 11.4V, and the inverter shows 40%. According to this calculation, the power consumption is 280AH* (84%-40%)=280*44%=123.2AH, 12*123.2=1478WH, about 1.5 kilowatt-hours.
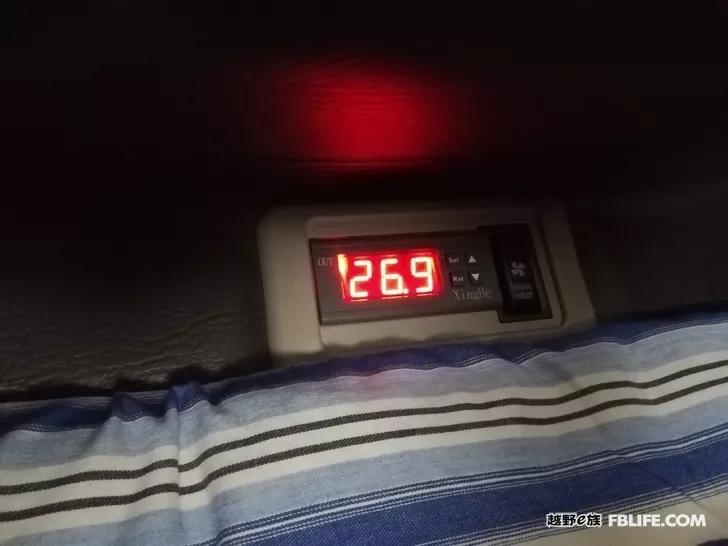
When I woke up the next morning, the air inlet temperature was 26.9°C.
The operating current is 28.6A.
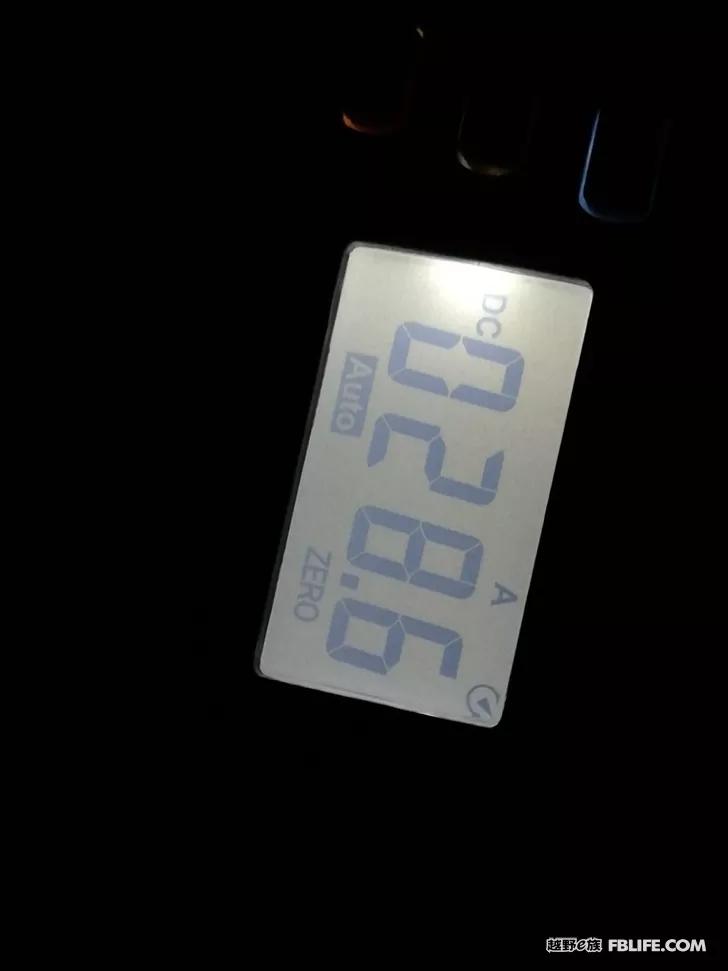
The battery voltage is 11.4V when powered off.